After waiting for weeks for my local overpriced grocery store to get in some whole squid, I finally caved and went to their other location in nearby Trail today, where I had seen the squid initially. After searching and eventually asking a member of the meat department's staff if they had any packages of frozen squid, I finally struck gold!
This is a dish I'd been wanting to make since I got Giada's Kitchen to review last month. It's super simple, quick, all made in one pot, and if you love calamari, you'll love this. It's also healthy and not terribly high in calories. I stayed true to the original recipe except I omitted the hot pepper flakes because I don't like them.
Calamari Stew by Giada de Laurentiis, adapted slightly by moi
3 tbsp olive oil
4 garlic cloves, peeled and halved
2 cups dry white wine
2 (15oz/389mL) cans tomato sauce
2 tsp thyme
1 tsp salt
1 tsp pepper
2lbs calamari, bodies thinly sliced, tentacles whole (be sure to remove the "spine" from the tubes; it's a clear boney thing that you don't want to eat; I assumed my squid had had this removed along with the innerds, but I was wrong, so I had to remove them myself. It's very easy; they just come free with a slight tug)
Warm olive oil over low heat in a medium pot. Add the garlic and cook, stirring frequently until fragrant - about 2 minutes. Increase the heat to medium. Slowly add the wine and cook for 1 minute, then add the tomato sauce, thyme, and seasonings. Bring the mixture to a simmer and cook for 8 minutes. Stir in the calamari and continue to cook just until the stew comes back to a simmer and the squid is opaque, about 2 more minutes.
I served myself with some toast made from my homemade bread.
This would have been utterly spectacular had I used a decent white wine. Since I don't actually drink wine (I never developed a taste for the stuff) I just take whatever happens to be either the cheapest at the liquor store or whatever my SIL has kicking around her kitchen. If I have leftovers, it hangs out in the fridge until I need it next, even if this means months or even a year. I never tasted the wine before I added it to the stew, though I did sniff it and it smelled winey. Well, um...it must have been a tad...off... because my stew tasted a little off and I know it was the wine. So, lesson learned: use fresh, decent wine.
And...I couldn't resist but be a bit cheeky when I was cutting up my calamari and goof off a bit with the squid tubes:
Yeah, play with your food for sure - from time to time!
Friday, October 31, 2008
Thursday, October 30, 2008
P-p-p-Pumpkin!
Last week I snagged a pumpkin at Save-On, where they were on sale for $4 each. I could buy canned, but fresh and home-processed is way better, and much cheaper.
I began by cutting up the pumpkin and removing the seeds, which I rinsed well, salted and roasted. I put the pumpkin, skin up, on a baking sheet lined with one of my trusty silicone baking mats. I put the oven at 375F and just under an hour later, I had a whole bunch of pumpkiny goodness.
After letting the pumpkin cool slightly, I scraped the flesh from the skin and put the flesh in a sieve over a bowl, because you need to get as much of the water out of the pumpkin as possible. Every so often, as the pumpkin cooled, I mashed it against the side of the sieve to press out more water. When it was completely cool and didn't look like there was much water left in it, I packaged it up into 1 cup bundles and froze them. I got nearly 5 cups, which is great! I also got a great couple of snacks from the roasted pumpkin seeds.
Today I made some cookies with the pumpkin, and they were fantastic. I've really been fancying some pumpkin baking and I had a taste for pumpkin combined with chocolate.
Pumpkin, Chocolate Chip, and Cranberry Cookies
2 1/4 cups flour
1/2 tsp cinnamon
1/4 tsp each allspice and cloves
1 tsp baking powder
1/2 tsp each salt and baking soda
1 cup butter, softened
1 cup sugar
1 can/15oz/1 3/4 cups pumpkin
2 large eggs
1 tsp vanilla
2 cups chocolate chips
1 cup dried cranberries
1. Preheat oven to 350.
2. Beat together butter & sugar until light & fluffy. Add eggs one at a time. Add vanilla and pumpkin. Combine well. Sift together dry ingredients and combine with the butter mixture. Fold in chocolate chips & cranberries.
3. Bake for 12 - 15 m or until golden brown and edges are slightly browned. Remove to wire racks and cool completely.
Enjoy!
Wednesday, October 29, 2008
Ham & Pea Soup, Rather Unlike Mom's
After Canadian Thanksgiving was over with on the 13th, I inherited a ham bone from the dinner. I was very excited about this because it meant that I could attempt to make my mom's ham & pea soup, which I grew up on and which I totally loved. We all did! If she didn't have a ham bone, she used a smoked pork hock that worked just as well. The last time I had this soup was during a visit a year ago, and just the smell of it cooking brought back such great memories. My mom's cooking often does that, actually. Her spaghetti sauce smells has exactly the same effect on me!
The ingredients for the soup are simple:
ham bone (or hock)
carrot
onion
potato
split peas
bay leaves
salt & pepper
water
The method is also simple:
Chop veggies in food processor. Throw everything in slow cooker and cover with water. Cook on high for 8 hours. At the end of the 8 hours, take out the bone and remove the meat. Return the meat to the pot and serve.
I was sooooooo pumped about this! It smelled amazing as it bubbled all day and I couldn't wait to try it.
Alas...It tasted nothing like Mom's. In fact, it looked nothing like Mom's either - both in terms of colour and consistency. My disappointment was as serious as a heart attack.
Perhaps I should have adjusted my expectations. After all, although my mom had showed me how to make this and I swear I did everything she did, she didn't actually make the soup, so it was missing that je ne sais quois, that secret something that moms use in their cooking that just can't be replicated no matter how specific the recipe.
None of this is to say that the soup was inedible - it was OK, and it got better after a few days in the fridge. I was just expecting something else. I was expecting mom's soup. What I got was the Wandering Coyote version of her mom's soup.
Oh well. It provided me with several meals and I gave some to my brother, too, who really appreciated it.
Tuesday, October 28, 2008
Orange Poppy Seed Muffins
I have a lot of cookbooks, and recently, when thinning out my general belongings, I decided that the cookbooks I own need to pull their weight or else I might be forced to donate them. Sounds cold, eh? Well, I've moved so many times in the last few years, and I acquire lots of books via my reviewing gig, that I've gotten quite ruthless with not only my books, but all of my possessions.
I've had The Essential Baking Cookbook for quite a while, and it has not been pulling its weight. I actually have a whole bunch of The Essential...series, and to be honest, none of them have been pulling their weight lately. Problem is, they're just so darned nice! Anyway, I took a good hard look at this book last week and it actually has a lot in it that really appealed to me, so I marked off some recipes and on I decided to try out the Orange Poppy Seed Muffins on page 31 right away.
What had I been waiting for? The muffins were awesome!
Now, this is an Australian publication, so self-raising flour is found in most of the recipes, but it is available in these parts (Brodie XXX brand) and I did have some on hand. The measurements are in volume and weight, so if you don't have a good kitchen scale you're not totally hooped. For the purposes of this post, I'll just use volume except with the butter where no volume is given.
Orange Poppy Seed Muffins
2 1/2 cups self-raising flour
1/4 cup poppy seeds
1/3 cup sugar
125g/4oz butter
1 cup orange marmalade
1 cup milk
2 eggs
1 tbsp orange zest
1. Preheat oven to 400F and prepare enough muffin tins for 12 muffins.
2. In a small saucepan, heat the butter and 2/3 cup of the marmalade until the butter is melted and the mixture is combined.
3. Whisk together the dry ingredients in a large bowl and make a well in the centre. In a small bowl, whisk together the eggs and milk. Add this to the well and stir. Add the butter/marmalade mixture. Fold gently and don't overmix. The batter may still be lumpy but don't panic! It'll all work out!
4. Fill muffin cups and bake for 25 minutes or until golden brown and a tester inserted in centre comes out clean.
5. Heat the remaining marmalade in saucepan and brush it over the tops of the warm muffins. Remove the muffins to a rack to cool completely.
Enjoy!
Monday, October 27, 2008
Out...
I am having serious internet connection issues (which, if you want, you can read more about here), so I'm not going to be around visiting my regular haunts until they are resolved. I have a couple of posts scheduled for publishing this week, but until I can get on the web reliably - which I hope is soon! - that's about it for now.
Sorry, guys! My Google reader has over 100 posts in it and I just can't read any of them. I hope this post publishes, in fact!
Take care.
Phew, it published! But I have to let this go for a while...
Sorry, guys! My Google reader has over 100 posts in it and I just can't read any of them. I hope this post publishes, in fact!
Take care.
Phew, it published! But I have to let this go for a while...
Magazine Monday #13: Greek-spiced Baked Shrimp
Last week, my copy of Gourmet's November issue arrived in my mailbox, and I was delighted to find it chock-full of recipes that I really want to try. Today's Magazine Monday submission is one of those recipes. The recipe has yet to be posted on the Epicurious web site, so here it is.
Greek-spiced Baked Shrimp, Gourmet November 2008
1 medium onion, chopped
2 garlic cloves, finely chopped
3 tbsp olive oil
1/2 tsp hot pepper flakes
1/2 tsp ground cinnamon
1/4 tsp allspice
1 28oz can whole tomatoes in juice, chopped, juice reserved (cripes, just used diced!)
pinch of sugar
1 1/4 lb large peeled and deveined shrimp
1/4 lb feta cheese, crumbled (about 2/3 cup)
2 tbsp chopped dill
1. Preheat oven to 375F and put rack in the middle.
2. Cook onion and garlic in oil with 1/4 tsp salt in a medium heavy saucepan over medium heat until soft - about 5 minutes. Stir in spices and cook, stirring for 30 seconds. Add chopped tomatoes with juice and sugar; simmer, uncovered, stirring occasionally, until slightly thickened - about 20 minutes. Remove from heat.
3. Season shrimp with some salt & pepper, then add them to the tomato mixture. Transfer to a 2-qt shallow baking dish and top with feta. Bake until just cooked through, 18 - 20 minutes. Serve sprinkled with dill.
OK, great recipe, very tasty, quick, and not bad for you. I will admit I didn't follow the instructions to the letter, though. I didn't bake this because I didn't have enough shrimp and thus I had a much soupier mixture that wouldn't have baked up very well. So, I turned this into a sort of stew, served over rice. I added the feta as a garnish. I also didn't use the hot pepper flakes as I don't like them. But, this is a delicious dish and it worked very well for me despite my changes.
Sunday, October 26, 2008
Lemon Juice Shortage: The Proof!
OK, so I've previously blogged about the lack of lemon juice in my local grocery stores (here and here) and the exorbitant cost of lemons that look like they've seen way better days. Last week, at a big box store, I gathered the courage to take photographs of the shortage (while I am comfortable photographing my food in a restaurant, it seems a little weirder to take pictures of stuff in grocery stores...).
Here is a picture of the abundance of lime juice available, and the empty spot on the right where the lemon juice should be.
Here is a picture taken in the produce section of this particular grocery store. As you can see (sort of) lemons go for 98 cents each, unless you buy them in twos, in which case you get them for 88 cents each. Call me crazy, but this is akin to highway robbery if you ask me! On the plus side, however, these lemons look to be in better shape than I've seen anywhere else. I still didn't buy any, though.
So there you have it.
Saturday, October 25, 2008
Canadian 100
Yep - it's another one! This came from the Cardamom Addict, who got it from Maple Syrup and Poutine.
1. Arctic Char
2. Ketchup flavoured chips (ew!)
3. Wild Rice Pilaf
4. Caribou Steak
5.Gourmet Poutine (I think poutine is absolutely the most disgusting concoction next to Steak & Kidney pie)
6. Screech
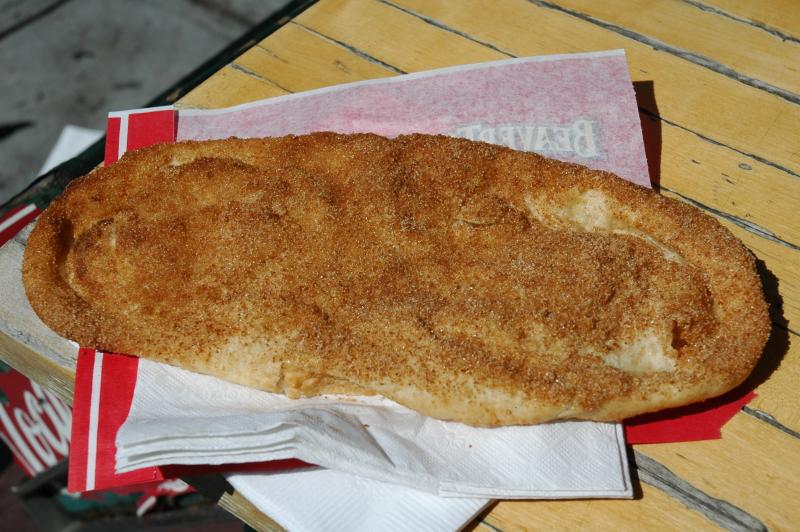
7. Beaver Tails (on the Rideau Canal, no less!)
8. Maple Baked Beans
9. Bison Burger
10. Bumbleberry pie
11. Nanaimo bar
12. Butter Tarts
13. Cedar Planked B.C. Salmon
14. Wild Blueberries
15. Pure Local Cranberry Juice
16. Chocolate from Ganong or Purdy’s (OMG - Purdy's is MY FAVOURITE!!)
17. A cup of warm cider from your local orchard
18. Caesar
19. 4 of the following types of apples: Cortland, Empire, Golden Delicious, McIntosh, Spartan, Greensleeves, Liberty, Granny Smith, Red Delicious, Honeycrisp, Golden Russet, Idared, Gala
20. Freshly foraged mushrooms (not in Canada, though; in the UK)
21. Dinner cooked by Michael Smith, Susur Lee or Rob Feenie (hah! I wish!)
22. Fondue Chinoise
23. Dish created from a Canadian Living Magazine recipe (hahaha)
24. Peameal Bacon Sandwich from St. Lawrence Market in Toronto
25. Lobster bought directly from a boat in a Maritime harbour (I have had a lobster dinner before, however, at a fancy seafood place in Halifax)
26. Handmade perogies from your local church or market
27. Alberta Beef at an Alberta Steakhouse
28. Leamington Tomatoes
29. Roasted Pheasant
30. Wild game hunted by someone you know
31. Ice Wine
32. Habitant Pea Soup
33. Any Canadian Artisanal Cheese
34. Bannock
35. Tourtiere
36. Flapper Pie
37. Jellied Moose Nose
38. Saskatoon Berries
39. Fish and Brewis
40. Screech Pie
41. Fiddleheads
42. Montreal Smoked Meat Sandwich (Oh yeah! In Montreal, no less!)
43. Flipper Pie
44. Montreal Bagels with Smoked Salmon
45. Toutins
46. Jam Busters
47. Bakeapple Pie
48. Bridge Mixture
49. Canadian Style Pizza (bacon, pepperoni, mushrooms)
50. Shreddies
51. A cone from Cow’s Ice Cream (I LOVE Cow's!)
52. Lumberjack or Logger’s Breakfast
53. Jigg’s Dinner
54. Rappie Pie
55. Pemmican
56.Lake Erie Sturgeon Caviar (hate roe)
57. Belon Oysters (I have had Malpeque Oysters, though)
58. Brome Lake Duck
59.Beer from a stubby bottle (I hate beer)
60.A beer from Unibroue or Phillips Brewery (see above)
61.Salt Spring Island Lamb (I don't like lamb)
62. Fry’s Cocoa
63. A bag of Old Dutch Potato Chips
64. Every Flavour of Laura Secord Suckers
65. Chicken Dinner from St Hubert’s or Swiss Chalet (never been to St. Hubert's but have been to Swiss Chalet and it's not my cup of tea)
66. Hickory Sticks
67. An entire box of Kraft Dinner
68. Candy Apples (NOT caramel apples)
69. Corn from a roadside stand
70. A meal at Eigensenn Farm
71. Okanagan Peaches
72. Berkshire Pork
73. PEI Potatoes
74. Something cooked in Canola oil
75. Figgy Duff
76. Blueberry Grunt
77. High Tea at the Empress Hotel (I have had High Tea several times at Chateau Laurier, however)
78. Fresh maple syrup hardened on the snow
79. Oreilles de Christ
80. Nova Scotia Beer Warmer
81. A cheese plate containing Bleu Bénédictin, Friulano, St. Maure and Oka.
82. Black or red currant jam
83. Maple glazed Doughnut from Tim Horton’s with aLarge “Double Double” (don't like coffee)
84. A glass of Mission Hill’s “Oculus”
85. Alberta Pure Vodka
86. Chokecherries
87. Canada Day Cake
88. Boulettes
89. Canadian Iced Tea
90. Mead
91. Fricot
92. Grandperes
93. Local honey
94. Creton on toast
95. Glen Breton Rare
96. A whole box of Smarties, where the empty box is then used as a kazoo
97. Grilled cheese made with Canadian Cheddar
98. A meal from Harvey’s (they make an excellent burger, if I do say so myself)
99. Lake Erie Perch
100. Red Rose Tea
My score: 42. Ouch! Does this make me less Canadian? Quite frankly, I've never heard of a lot of these things!
1) Copy this list into your blog or journal, including these instructions.
2) Bold all the items you’ve eaten.
3) Cross out any items that you would never consider eating.
1. Arctic Char
2. Ketchup flavoured chips (ew!)
3. Wild Rice Pilaf
4. Caribou Steak
5.
6. Screech
7. Beaver Tails (on the Rideau Canal, no less!)
8. Maple Baked Beans
9. Bison Burger
10. Bumbleberry pie
11. Nanaimo bar
12. Butter Tarts
13. Cedar Planked B.C. Salmon
14. Wild Blueberries
15. Pure Local Cranberry Juice
16. Chocolate from Ganong or Purdy’s (OMG - Purdy's is MY FAVOURITE!!)
17. A cup of warm cider from your local orchard
18. Caesar
19. 4 of the following types of apples: Cortland, Empire, Golden Delicious, McIntosh, Spartan, Greensleeves, Liberty, Granny Smith, Red Delicious, Honeycrisp, Golden Russet, Idared, Gala
20. Freshly foraged mushrooms (not in Canada, though; in the UK)
21. Dinner cooked by Michael Smith, Susur Lee or Rob Feenie (hah! I wish!)
22. Fondue Chinoise
23. Dish created from a Canadian Living Magazine recipe (hahaha)
24. Peameal Bacon Sandwich from St. Lawrence Market in Toronto
25. Lobster bought directly from a boat in a Maritime harbour (I have had a lobster dinner before, however, at a fancy seafood place in Halifax)
26. Handmade perogies from your local church or market
27. Alberta Beef at an Alberta Steakhouse
28. Leamington Tomatoes
29. Roasted Pheasant
30. Wild game hunted by someone you know
31. Ice Wine
32. Habitant Pea Soup
33. Any Canadian Artisanal Cheese
34. Bannock
35. Tourtiere
36. Flapper Pie
37. Jellied Moose Nose
38. Saskatoon Berries
39. Fish and Brewis
40. Screech Pie
41. Fiddleheads
42. Montreal Smoked Meat Sandwich (Oh yeah! In Montreal, no less!)
43. Flipper Pie
44. Montreal Bagels with Smoked Salmon
45. Toutins
46. Jam Busters
47. Bakeapple Pie
48. Bridge Mixture
49. Canadian Style Pizza (bacon, pepperoni, mushrooms)
50. Shreddies
51. A cone from Cow’s Ice Cream (I LOVE Cow's!)
52. Lumberjack or Logger’s Breakfast
53. Jigg’s Dinner
54. Rappie Pie
55. Pemmican
56.
57. Belon Oysters (I have had Malpeque Oysters, though)
58. Brome Lake Duck
59.
60.
61.
62. Fry’s Cocoa
63. A bag of Old Dutch Potato Chips
64. Every Flavour of Laura Secord Suckers
65. Chicken Dinner from St Hubert’s or Swiss Chalet (never been to St. Hubert's but have been to Swiss Chalet and it's not my cup of tea)
66. Hickory Sticks
67. An entire box of Kraft Dinner
68. Candy Apples (NOT caramel apples)
69. Corn from a roadside stand
70. A meal at Eigensenn Farm
71. Okanagan Peaches
72. Berkshire Pork
73. PEI Potatoes
74. Something cooked in Canola oil
75. Figgy Duff
76. Blueberry Grunt
77. High Tea at the Empress Hotel (I have had High Tea several times at Chateau Laurier, however)
78. Fresh maple syrup hardened on the snow
79. Oreilles de Christ
80. Nova Scotia Beer Warmer
81. A cheese plate containing Bleu Bénédictin, Friulano, St. Maure and Oka.
82. Black or red currant jam
83. Maple glazed Doughnut from Tim Horton’s with a
84. A glass of Mission Hill’s “Oculus”
85. Alberta Pure Vodka
86. Chokecherries
87. Canada Day Cake
88. Boulettes
89. Canadian Iced Tea
90. Mead
91. Fricot
92. Grandperes
93. Local honey
94. Creton on toast
95. Glen Breton Rare
96. A whole box of Smarties, where the empty box is then used as a kazoo
97. Grilled cheese made with Canadian Cheddar
98. A meal from Harvey’s (they make an excellent burger, if I do say so myself)
99. Lake Erie Perch
100. Red Rose Tea
My score: 42. Ouch! Does this make me less Canadian? Quite frankly, I've never heard of a lot of these things!
Friday, October 24, 2008
Why, Thank You
Blog pal Meg, of Megan's Munchies bestowed me with this lovely award today!
By way of acceptance speech, allow me to say this:
I really appreciate all of my readers and all those who take the time to comment here. This blog started off small, and I'm so pleased that nearly four years later, it's growing steadily and has gained a regularly following. I'm also grateful to those whom I've "met" on this food blogging journey - all of you have enriched my experience here in blogland!
As for whom to pass this on to, that's a toughie. Here are my five picks:
Cherie at Heightened Awareness. Cherie has been a regular reader of my "every day" blog for quite a while now, and she herself has recently decided to start a new blog that is not only devoted to food, but to celebrating the abundance in her life.
Emily Rose over at Sandmuffin. I recently discovered Emily Rose via the Foodie Blogroll, and I really enjoy her mixture of kitchen adventures and adventures in parenting.
My good friend (in real life, no less!) sp over at Whoville, who blogs about many things, including running and living the vegan life.
Helene of La Cuisine de Helene. Another find via the Foodie Blogroll, I have only very recently discovered Helene's blog, and I am always delighted to find new Canadian food blogs, particularly British Columbian ones! Her pictures are mouthwatering!
Finally, a blog I've been following for quite a while now, Garlicster. Featuring - you guessed it - garlic-centred recipes, this is your go-to place for all things garlic!
Product Review: Larabar
Meg of Megan's Munchies has frequently blogged about her love of Larabar, and I became intrigued. I began to be on the lookout for them and on Wednesday I finally found some at Save-On Foods in Nelson! Only an hour away from here!
They didn't have the greatest selection - perhaps only four or five different kinds - and they didn't have any of the really delicious-sounding new flavours, but I did pick up a couple ($2 each; bear in mind that I'm on a budget!): the apple pie and the cherry pie. Since coming home Wednesday night, I have consumed both of them.
In short, I liked them. I'm not terribly fond of dates, but although both are full of dates, I could handle them.
The bars are rather sweet, however. While I should be the last person to complain about this, I am just glad the bars are small because the flavours are really intense.
I love that these bars are made with whole, natural ingredients and are apparently vegan. They are high in fibre and other nutrients, and they make a nutritious little snack.
I'm really hoping I can find some of their other flavours, like the ones containing chcocolate and such, and there even appears to be a tiramisu version, too! You cannot go wrong with tiramisu!
Thanks Meg!
Thursday, October 23, 2008
Foodbuzz Publisher Community Launches
Oh, how I love Foodbuzz!
Today in the mail I received more swag: an apron and a spatula! The apron is really nice and roomy and long and should keep me well-protected in the kitchen. And you cannot ever have too many spatulas!
This is all in celebration of Foodbuzz's launch of their publisher community, of which I am a member.
Thank you so much, Foodbuzz! You guys are the best!
(Previous swag blogged about here.)
Lunch at The Preserved Seed
This past summer I posted a review of The Preserved Seed, which is located in Nelson. It serves locally produced, organic food that is simple and well-prepared and fantastic. The organization that runs this restaurant is one of the Twelve Tribes, and they are super-friendly and run a great eatery. Yesterday, I had the opportunity to lunch there again with my family - and this time I got pictures of our food (last time, we dug in before I had a change to photograph anything)!
For dessert, all three of us had the key lime bar, which is actually a cream cheese-based dessert similar to a key lime cheesecake. It was excellent! The Preserved Seed makes the best coconut cream pie, which is what I always order when I go there, but it's been so popular recently that they were out yesterday!
My SIL had the rice medley, which today was cashew miso, and she had it with chicken (you have the option of that or tofu). It was served with their homemade bread.
Both my dad and I had the sandwich special, which was BBQ Turkey. It was excellent! It had a cabbage slaw in it that was a creamy counterpoint to the tangy BBQ sauce. I had mine with homemade chicken barley soup, and Dad had his with a side salad.
For dessert, all three of us had the key lime bar, which is actually a cream cheese-based dessert similar to a key lime cheesecake. It was excellent! The Preserved Seed makes the best coconut cream pie, which is what I always order when I go there, but it's been so popular recently that they were out yesterday!
Thanks to The Preserved Seed for another stellar meal!
Wednesday, October 22, 2008
Racy Wedding Cakes*
*Warning: I make every attempt to keep my food blog G-rated, but this time I couldn't resist but post something extremely risque. So, if you are offended by sexual content, do not read on - be warned!
OK, there is this great cake site called Cake Wrecks, which I have recently discovered and have started lurking around. It's a fantastic blog, I must say. When I discovered it, I suddenly remembered this email I'd received four years ago from a friend of mine who finds some really bizarre stuff on the net. The email was entitled "Wedding Cakes from Around the World," which seems innocuous enough, but when I opened it, whoa! I forwarded it on to some of my culinary school classmates who were into cake decoration, and we all had a good laugh. Here are some of the pictures.
I'll now get back to regular G-rated stuff!
Tuesday, October 21, 2008
Lemon Juice: The New Gold
Over the summer, I wrote about our lemon juice shortage, which, I am sad to report, is still ongoing. What fresh lemons I've seen are either exorbitantly expensive (one local, large chain store sold them for $1.19 the last time I was there - ouch!) or look really beaten up and crappy. Still no lemon juice anywhere either.
But, my SIL scored on the lemon juice front during a cross-border shopping spree last week to Spokane, WA. At Costco, she found these 1.4L/48oz bottles of lemon juice - with nifty flip top lid for easy pouring! - for around $2.50USD. I nearly keeled over when she told me this. First of all, there appears to be no shortage of lemons or juice in the States (I did see a 2lb bag of lemons for very little money during my last cross border shopping spree, but since we can't bring fresh produce over the border I didn't buy any) and second, even if we could get lemon juice up here right now, a bottle this size would probably be around $8, if not more! My SIL offered me a bottle and of course I accepted it - and will now be rationing closely it until the return of lemons and lemon juice. In fact, I'm almost not wanting to bake with it at all, and totally hoard it instead! Ridiculous, I know, but when something is hard to get or limited, you kinda want to use it very, very carefully...
So, in celebration of all things lemon but taking into account that even though I now possess nearly 1.5L of this new gold, I have reluctant to part with even a drop, I present you with a recipe reprise from the archives of this blog: Real Lemon Pie.
Real Lemon Pie (originally posted here)
Filling
4 thin-skinned lemons (I don't know how you tell a thin one from a thick one without cutting it first, but I just used what I had on hand)
2 cups granulated sugar
4 large eggs
Shortcrust Pastry
1 3/4 cups all purpose flour
150g (5oz) chilled unsalted butter, chopped
2 tbsp granulated sugar
3 - 4 tbsp cold water
1 egg, beaten, for glazing
1. Wash the lemons. Slice 2 unpeeled lemons very thinly and remove the seeds. Peel the other lemons, removing all pith and seeds, and slice the flesh thinly. Put all this in a bowl, not metallic, with the 2 cups of sugar and mix well, coating all the lemon with sugar. Cover and refrigerate over night.
2. Preheat oven to 350F. For the pastry, sift together the salt and the sugar. Sable in the butter. (Remember what sable means, from the previous post? No? Ok. Rub the butter in with your fingertips - quickly so it doesn't melt.)
3. When you have a cornmeal-like consistency, add the water, one tablespoon at a time and toss gently with a fork. Add just enough water so that the dough comes together and is rollable. Divide in half and roll out 2 10 inch circles.
4. Lightly grease a 9" pie plate. Line the pie plate with one disk of dough; cover and chill. Somehow chill the other disk of dough, too; I put it into a second pie plate for easy tranferring.
5. Beat the eggs well and add the lemon slices, mixing gently but thoroughly. Pour the filling into the shell and put on the "lid." Crimp the edges to seal them. Decorate the top with pastry scraps. Brush on the beaten egg you reserved for the glaze, and bake until golden brown - 55 minutes to an hour. But keep an eye on it. Let it cool completely before serving.
Monday, October 20, 2008
Magazine Monday #12: Sugar Cookies, Halloween Style
What do you do if it's Friday night and you don't have a life? You make cookies! What do you do on Saturday when you don't have a life? You decorate cookies!
I'm not the biggest Halloween freak around; I think it's a kind of silly holiday whose original roots have become just as distorted as the roots of Christmas and Easter (i.e. a pagan celebration appropriated by the Catholic Church way back when in order to Christianize the Celt out of the Celts). But, no matter how much I poo-poo the modern-day version of an ancient festival, it is always - as are the other holidays - a great excuse to bake! I own a few Halloween cookie cutters, and have kept in my recipe binder a recipe for sugar cookies that came from the May 2006 issue of Canadian Living (no link to the FREE recipe on the site; that's because I'm pretty sure it shows up in the new Complete Canadian Living Baking Book, much to my annoyance). So, here it is.
Sugar Cookies, by Canadian Living
3/4 cup butter, softened
1 cup granulated sugar
1 egg
1 tsp vanilla
2 1/2 cups all purpose flour
1/2 tsp baking powder
pinch salt
1. Line cookie sheets with parchment or a silicone mat.
2. In a large bowl, beat butter and sugar until light and fluffy. Beat in egg and vanilla. In a separate bowl, whisk together the dry ingredients and stir into the butter mixture in three additions (so you don't overwork the flour). Divide dough in half. Pat into two discs and wrap in plastic wrap. Refrigerate until firm, about 1 hour (or, do as I do and put the discs in the freezer for 15 minutes or so).
3. Roll out the dough to 1/4". Cut with cookie cutters. Bake at 350F for 10 - 12 minutes, or until light golden on the bottoms and edges. Cool completely.
My dough didn't quite come together as it should, so I added a tiny bit of cream until it was the proper consistency. Such is life with baking - you learn to adapt.
I used Royal Icing to decorate, and to make it I don't usually use a recipe. Basically, I take an egg white and beat it slightly in a medium bowl to relax it. I then add in icing sugar until I get the consistency I want. In this case, you want to be able to pipe it through a small tip easily, but if you were putting together a gingerbread house, you'd make the royal icing much stiffer. For the cookies that have solid colours, the icing needs to be runny enough to flood the surface of the cookie, leaving a smooth top. The black outlining and detail was done with a #2 Wilton tip, and in this case, the icing was quite stiff so the colour didn't bleed into the background colour.
All in all, a nifty little project that kept me busy for a few hours on a quiet fall afternoon. I am now officially Halloweened out!
Full Flickr set here.
Friday, October 17, 2008
Huckleberry Muffins
My roommate is the Huckleberry Queen. She harvested about 26 cups of local huckleberries, and if you were reading over the summer, she made a bunch of pies. Since last weekend was Canadian Thanksgiving, and since she had some family come from out of town, she made some muffins. I can attest to the fact that they were wonderful! The recipe came from one of the Best of Bridge cookbooks, The Best of the Best of, And More. The original recipe calls for blueberries, and she decided against putting on the topping.
Super Huckleberry Lemon Muffins
2 cups flour
1/2 cup sugar
1 Tbsp baking powder
1/2 tsp salt
zest of 1 lemon
1 egg
1 cup milk
1/2 cup butter, melted
1 cup huckleberries
Topping: 1/4 cup melted butter, 2 Tbsp lemon juice, 1/2 cup sugar
1. Combine dry ingredients and zest in a large bowl.
2. Combine the liquid ingredients and blend in a medium bowl.
3. Add the liquid to the dry and combine. Batter might be lumpy.
4. Bake @ 375F for about 20 minutes. Yields about 16 muffins.
5. For the topping: in a small bowl combine the butter and lemon juice. Put the sugar in a separate bowl. Slightly cool the muffins on a rack and dip the tops in the lemon butter, then in the sugar. Cool completely.
Thursday, October 16, 2008
Girls Dinner at the Shovel
A few months ago, I wrote a gushing review of a local pub called The Flying Steamshovel. They do have amazing pub grub, and last night I went to have a girls dinner with my friend P. We were both in burger moods, and I was in a cocktail kind of mood, so I ordered a Long Island Iced Tea. I have not had alcohol in way too long - and man, was it delish!
P has a crazy-busy week and there was a group of obnoxious, seriously drunk guys there being really rowdy (um, on a Wednesday night? at dinnertime? Sigh...such is the town I live in), so we cut our evening short. It was so nice while it lasted, though, and despite the intoxicated idiots creating a ruckus two tables down, the Shovel still has great food!
This is the Shovel Burger, which P ordered. Huge patty, choice of cheese, all the fixings.
Somewhat appropriately, I ordered a sandwich called "The Hangover." Egg-dipped bread, chicken, ham, swiss cheese, and caramelized onions - fantastic!
P has a crazy-busy week and there was a group of obnoxious, seriously drunk guys there being really rowdy (um, on a Wednesday night? at dinnertime? Sigh...such is the town I live in), so we cut our evening short. It was so nice while it lasted, though, and despite the intoxicated idiots creating a ruckus two tables down, the Shovel still has great food!
Wednesday, October 15, 2008
Ode to Island Farms...
I'm generally not one to go on and on about the specific products I use, apart from cookbooks and chefs I might like, but I thought I'd break my own mould a bit and wax poetic about one of my favourite things, Island Farms ice cream.
When I was in university, I fell in love with all things Island Farms, beginning with their frozen yogurts, specifically their chocolate frozen yogurt. I also fell in love with their yogurts, especially the "vanilla plus" line (to this day, Black Cherry is still my all-time fave). From there, I fell in love with their line of orgasmically brilliant ice creams, my favourite being Moose Tracks.
There was an IF plant right in downtown Victoria, and I loved the fact that I could see where some of their products were being made, and it was obviously local. Drive up-island towards Nanaimo, which I did often, and you could see IF dairies - all local.
I moved to Ontario upon graduation from university, but when I came back to the coast to visit, I always coveted IF products. When I went to culinary school in Vancouver four years ago, I was thrilled to see that T&T carried IF dairy products, and I immediately stocked up on chocolate milk and yogurt. Our culinary school used IF Victoria Style Cream Cheese, and I loved the tartness of it compared with the competition's (I never gave it much though in uni, but in culinary school my tastebuds were just starting to become more refined). Access to IF was one thing that screamed "home" to me.
I came back to BC to live in 2006, and luckily, everywhere I've lived since then, I've had access to IF dairy products. IF was taken over by Agropur, a Quebec dairy company, and I've heard that not all of IF's dairies and plants are on the Vancouver Island now. I can't taste a difference, however.
But let's get back to ice cream, because IF ice cream of any flavour is the stuff of the gods. As mentioned, my favourite flavour is Moose Tracks, which is vanilla with peanut butter cups and a fudge swirl. Any flavour in the Denali Premium line is outstanding, though. The Tin Roof Sundae is also fabulous, and at one ice cream stand in Victoria, I even had...oh, man, this sends shivers up my spine...Nanaimo Bar ice cream! Nanaimo Bar ice cream! I can't describe how good it was! But, I have yet to see this flavour make it to my local overpriced grocery store. IF has also brought out a Chocolate Plus line, and I have nearly polished off a container of Coffee Truffle Delight. It was stunningly rich and chocolaty, with just a hint of coffee in it.
Drooling much? I have yet to find a brand of ice cream I love more (I used to buy Cadbury's Dairy Milk ice cream, which was to die for but they discontinued it and I haven't seen it in any new incarnation around my local places at all), though I do make a wicked chocolate & Bailey's ice cream myself. Actually, most ice creams I make are pretty awesome, but even I can't beat my old favourites from IF.
Waxing done!
Subscribe to:
Posts (Atom)