Showing posts with label squares. Show all posts

Sunday, May 23, 2010

Magazine Monday #61: Chocolate-Orange Brownines

For once, a non-Canadian Living recipe!

We have having some serious renovations done around here and I have baked a few things for the contractors, who appear to all have sweet tooths. This works for me! I get to bake and not have to have any sweet stuff hanging around my place tempting me, and they get to have nice treats after a day's hard work.

This recipe for Chocolate-Orange Brownies comes from the March 2010 issue of Bon Appetit. Apparently, the recipe originated at Homepage Cafe in Bozeman, Montana, and it was included in the RSVP section of the magazine, where readers write in asking for recipes from restaurants and other eateries - hence it's not included in the recipe database on Epicurious.com. Gr!!!

Anyway, here it is.

Chocolate-Orange Brownies

non-stick vegetable spray
1/2 cup boiling water
6 tbsp natural unsweetened cocoa powder
1 1/4 cups packed dark brown sugar
3/4 cup all purpose flour
1/2 tsp baking soda
1/2 tsp baking powder
1/4 tsp salt
1 cup pecans, chopped
2 large eggs
10 tbsp (1 1/4 sticks...God I hate how US recipes do this! This is 1/2 cup plus 2 tbsp for you Canadians out there!) butter, melted & cooled
1 tbsp grated orange zest
1/2 tsp vanilla extract

1. Preheat oven to 350F. Spray 9x9x2" metal baking pan with spray. Whisk 1/2 cup boiling water with cocoa powder in a small bowl to blend. Whisk sugar, flour, baking soda, baking powder, and salt in a medium bowl to blend. Stir in pecans. Whisk eggs in a large bowl. Add butter, vanilla, and orange zest. Whisk cocoa mixture into egg mixture. Add flour mixture, stir just to blend. Transfer to prepared pan.

2. Bake until tester inserted into the centre comes out with a few moist crumbs attached, about 30 minutes. Let cool completely in pan on rack. Cut & serve.

These were a huge hit with both the contractors (we took them out on a big platter & my SIL provided them with cold beer!) and with my family. They were perfectly-textured and delicious! Definitely a keeper recipe!

Friday, December 18, 2009

Peanut Butter Tart Squares

I mentioned in an earlier post that I made about 33 dozen cookies this year, and this simple but totally decadent recipe was one of them. It's like a pecan tart, only with peanuts, and on a peanut butter cookie crust. These are not too sweet, surprisingly enough considering the corn syrup content. I got the recipe from this year's Bakefest insert that came in the December issue of Canadian Living, and I doubled it and used a 9x13" pan.

Peanut Butter Tart Squares

Base:
1/4 cup butter
1/4 cup smooth peanut butter
1/3 cup packed brown sugar
3/4 cup all purpose flour
1/4 cup corn starch
1/4 tsp salt

Topping:
1/2 cup corn syrup
2 tbsp corn starch
1/4 tsp baking powder
pinch salt
2 tbsp butter, melted & cooled
2 eggs, beaten
1 tsp vanilla
1/2 cup unsalted roasted peanuts
1/2 cup peanut butter chips
1/2 cup dark chocolate chips

1. Beat butter, peanut butter, and sugar in a bowl until creamy. Stir in flour, cornstarch, and salt until well combined and crumbly. Press into 8" pan lined with parchment paper. Bake at 350F for 12 - 15 minutes, or until pale golden around the edges. Set aside.

2. For the topping, stir together corn syrup, corn starch, baking powder, and salt until smooth. Stir in butter, eggs, and vanilla until well-blended. Pour over crust. Sprinkle peanuts, peanut butter and chocolate chips over the top.

3. Bake for 20 - 25 minutes or until golden and just set in the middle. Let cool completely in pan on rack. Cut into squares. This was probably my favourite out of this year's batch of baking. I just love peanut butter and chocolate together, and these squares totally satisfy that craving!

So, here are this year's cookies:

Two-Tone Chocolate Shortbread
Oatmeal Chocolate Chip Shortbread
Mini Mincemeat Tarts
Pecan Dulce de Leche Sandwich Cookies
Christmas Blondies
Pecan Cookies
Oatmeal, Cranberry, and White Chocolate Chip Cookies
and these squares

Not bad, eh?

Sunday, September 20, 2009

Magazine Monday # 50: Chocolate Walnut Tart

My dad's friend, who lives near Kelowna, has a walnut tree and some time ago I was gifted with a bag of walnuts from it. Yeah, I said "a while ago" because I let the nuts - still in their shells - sit around my kitchen for over a month. Why? Because I hate cracking nuts. Remember my hazelnuts from last year and the blister I got cracking them all? Well, I wasn't too excited about a repeat blister or sore hands. But, I didn't want to let the nuts go to waste, so I got out my cracker and set to work.

Man...About halfway through the bag - which yielded me 1 whole cup of nuts - I had a blister and a bruised-feeling palm. I'd also made a mess: the nuts were harder to crack than the hazelnuts and I guess letting them "mature" over the summer wasn't a good idea and the shells flew all over the place as I cracked them. My kitchen table & floor were both a disaster. But I had my one measly cup of nuts, enough for this Chocolate Walnut Tart recipe that came from the Feb. 2009 issue of Taste of Home, which came to me via my good friend Pierce earlier this summer. My nuts didn't need to be chopped; I had such a hard time prying them out of their shells that they were all in pieces - but my fingers were nice and soft from the oil and smelled really nice, so it wasn't all bad...

Chocolate Walnut Tart

Pastry for 9" single crust pie
1 cup coarsely chopped walnuts
1 cup semi-sweet chocolate chips
3 eggs
3/4 cup dark corn syrup
1/2 cup packed brown sugar
1/4 cup butter, melted
1 tsp vanilla

1. Press pastry into bottom & up sides of 9" fluted tart pan with removable bottom; trim off excess pastry. Sprinkle nuts & chocolate chips into crust.

2. In a bowl, combine the remaining filling ingredients & mix well. Pour into crust.

3. Bake at 350F for 25 - 30 minutes or until top is bubbly and crust is golden brown. Cool on a wire rack. Refrigerate leftovers.

OK. This was a massive FAIL. FAIL, I tell you!

First off, I made this in a 9" square pan because I wanted to freeze most of the tart and cutting it into squares would be much simpler. A 9" square pan is 81" in total area; a 9" round tart pan is 63.6" in total area. I mean, this is basic math, here...Correct me if I'm wrong. Anyway, my point is the square pan is bigger than the tart pan, so the filling was spread over a larger surface area.

But my tart didn't set! At all! I baked it for the allotted time, at the correct temperature, according to my oven thermometer. I then put it in for an additional 10 minutes - twice. Then, I put it in again, only to take it out shortly thereafter because the crust was getting too brown, as was the top. Upon cooling, the filling still didn't set. The sides were OK, if a bit gooey, but OK nonetheless, but the centre was a different story altogether. I refrigerated it for several hours, and still it didn't do its thing. It was a mess.HMPH!!! I was not happy and couldn't figure out where I'd gone wrong. The pan size shouldn't have made a difference. This is basically a pecan pie filling, and I've made tons of them before, and never had this problem. The only thing I can think of was that it was the recipe itself. Perhaps 2 eggs would have sufficed, instead of 3. I don't know.

I managed to salvage the squares around the edges and freeze them for our camping trip, and the middle I picked away at when I needed a sugar craving - but still, I found this to be a waste of valuable ingredients for me, not to mention the time I put into cracking all the nuts! Grrrr!

Wednesday, August 12, 2009

Easy Cookie Squares

It's cooled down - yay! I never thought I'd be so glad to see clouds, rain, and even fog! In celebration, I baked. I wanted to make something using my huckleberries, but I didn't know what. I got out my trusty Cookie Bible, which I seemed to recall had some blueberry squares in it that I could have made using huckleberries instead. I was right, there was one square recipe that would have been suitable, but it required a certain type of muffin mix I didn't have and have no intention of acquiring. But I did find this recipe for Easy Cookie Bars that looked pretty good, so I made them instead.

Easy Cookie Bars (adapted by moi)

1/2 cup butter
1 1/2 cups graham cracker crumbs
1 cup flaked coconut
1 cup chocolate chips
1 cup chopped nuts (optional)
1 can (14oz) sweetened condensed milk

1. Mix together butter & cracker crumbs. Press into parchment-lined 9" square pan.

2. Sprinkle the base with the coconut, chocolate, and nuts. Pour the sweetened condensed milk over the top.

3. Bake at 350F for 30 minutes or so, or until golden brown. Cool completely in pan.

OK. I had to adapt this recipe because the original wasn't going to work. The original recipe called for a 9x13" pan, but there was no way I was going to get that base into that size pan. I even tried pressing it into a 10" square pan and that wasn't going to work, either. I ended up using a 9" pan and that was perfect for the amount of base ingredients. However, I had to reduce the amount of coconut from 1 1/3 cups to 1 cup as the original amount would have been way too much. Now, because I was adapting on the go, I realized that I was going to have too much sweetened condensed milk for this size pan, too, but I used the whole amount as I didn't want just a little bit kicking around (that stuff is dangerous!). It was probably too much as the squares didn't set properly and didn't brown evenly.
The end result: a bit of a mess. The graham cracker base didn't stay together & disintegrated when I lifted a square out to taste. The squares were also quite gooey, and as I said, didn't set well. Taste-wise, they are very sweet, which is fine, but not terribly exciting.
I probably won't make these again. I won't say these are a waste of time & ingredients because I will find a way to freeze them, but even though there were super easy to make, they just didn't live up to my expectations. But, onwards & upwards, eh? At least it was cool enough to bake, and for that I'm very grateful!

Wednesday, April 15, 2009

Puffed Wheat Squares

These seem to be normal coffee shop fare around these parts, and I first got addicted to them when I worked at a coffee bar in Trail about year ago. Now, I make them pretty regularly at my current job, where I help bake for the coffee shop at the hospital. I always lick the bowl! These totally hit the spot when a chocolate craving comes upon me!

Puffed Wheat Squares

1/3 cup butter
1/3 cup corn syrup
1/2 cup packed brown sugar
1 1/2 Tbsp cocoa powder
6 cups puffed wheat

1. Melt the first 4 ingredients in a pot over low heat & bring to a boil, stirring frequently.

2. Measure the puffed wheat into a large bowl, and stir in the chocolate syrup mixture until well combined.

3. Press into a greased 8x8" square pan. Cool completely. Cut and serve.

Enjoy!

Monday, December 08, 2008

Magazine Monday #19: Chocolate Toffee Squares

This week's Magazine Monday contribution comes from the December 2008 issue of, what else, Canadian Living.

These squares do require some special equipment: the parchment paper is a must, but it's cheap and readily available, has many uses, and in some cases is even reusable; also, you'll need either a candy thermometer or a digital food thermometer to make the toffee layer. These bars are so decadent I could barely keep my hands off them, but I was disappointed that they didn't quite turn out like the ones in the picture! Ah well.

The recipe is here.


I used Nilla wafers and crushed them in a ziplock bag with swift, callous whacks from my rolling pin. It was fun.


The toffee layer was easy to make despite the fact that you need the thermometer. You essentially just melt the ingredients all together, and allow them to burble away on the stove for a bit until nice and caramel-y. I could happily have eaten this right out of the pot as it was.


I have no idea what the "thread" stage is that the recipe refers to, so I just simmered the mixture until it reached the specified temperature (I'm high altitude, so I boiled it to 112C). The mixture got nice toffee-ish flecks in it.


My ganache didn't set very well, despite being in the freezer for a while, but I hope that it will firm up after a longer sit. The toffee layer set very nicely and the entire package tasted out of this world!


As I mentioned in my last MM post, I'll be hosting MM for the month of December while Ivonne is away. If you have a magazine recipe you've made that you'd like to contribute, let me know and I'll link to you!

Enjoy!

Wednesday, December 03, 2008

Christmas Blondies

I got this recipe a few years ago from one of my very early readers, Granny Anny of Warm Butter Review, whose presence on the net I really miss. (Note to Granny Anny - you're missed out here in the blogosphere and I hope all is OK!) This is a totally foolproof, amazing blondie recipe that is adaptable in various ways. It also doubles and quadruples well, as I found when I used it professionally when I got my first job out of culinary school.

The original recipe calls for 1 cup of pecans, chopped and toasted and 6oz white chocolate chips. If you want to make a more brownie-like square, you can substitute 1/2 cup flour for 1/2 cup cocoa powder, sifted.

Blondies

1 1/2 cups all purpose flour
1 tsp baking powder
1/2 tsp salt
3/4 cup butter, melted and cooled
1 1/2 cups packed brown sugar
2 large eggs, lightly beaten
2 tsp vanilla
1 1/4 cups Christmas-coloured Smarties or M&Ms

1. Preheat oven to 350F and either line a 9x13" pan with parchment or grease & flour it.
2. Combine the dry ingredients in a small bowl.
3. In a larger bowl, combine the eggs, vanilla, sugar, and butter.
4. Add the dry ingredients and fold until combined.
5. Add the candy and spread into the pan.
6. Bake 20 -25 minutes or until light golden. DO NOT OVERBAKE. UNDERBAKING IS BETTER FOR A FUDGIER BLONDIE!

Cut into squares and serve. Or, freeze them in an airtight container until you need to whip them out for a Christmas function.

Monday, June 02, 2008

Magazine Mondays Inaugural Edition: Coconut Blondies

Ivonne over at Creampuffs in Venice started Magazine Mondays last fall, just to give some of us foodbloggers a bit of help with content and inspiration. Sometimes, I know for myself, I need that kind of structure.

I have subscriptions to Canadian Living, Bon Appetit, and Gourmet. It's like getting a series of cookbooks in my mailbox every month, and I love it.

The June 2008 issue of Gourmet featured four brownie recipes on the last page, which I just discovered yesterday. While I love a good brownie, I also adore a good blondie. I have a recipe I've used for a few years now, courtesy Granny Annie, that is wonderful and quadruples nicely for more commercial purposes. But this coconut version caught my eye last night as I re-read Gourmet over dinner.

Recipe here.

The result: OH.MY.GOD. Warm with vanilla ice cream: OH.MY.DOUBLE.GOD. Definitely a keeper!

Nutritional breakdown here.

Sunday, March 16, 2008

Brownies...Or Blackies?

I made these this weekend. My friend provided the chocolate, which was 85% cocoa content. The recipe is Jamie Oliver's, and can be found here. This picture is slightly over-exposed; the brownies were so dark they were nearly black.

Although it calls for dried sour cherries, I've had a devil of a time finding any dried cherries period around here. In this case, I substituted with cherry-flavoured dried cranberries. They're not sour, but they were OK. I also used pecans because my friend doesn't like walnuts.

These were so moist and rich I could only eat one or two the entire time I was there...

Tuesday, May 03, 2005

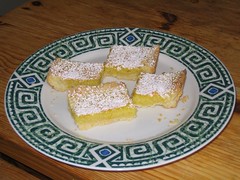
Lemon Squares


IMG_0473
Originally uploaded by wanderingcoyote.

The recipe is here.

LinkWithin

Blog Widget by LinkWithin