Showing posts with label apples. Show all posts

Sunday, May 20, 2012

Cooking with Betty Crackpot: Apple Crisp

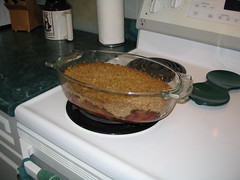
This is one of the easiest, satisfying desserts you can make and the versatility with it is huge.  I chose to make this particular recipe because my young, almost eight year old roommate, R, had claimed that she'd never had apple crisp before.  If she had, she said it wasn't that memorable.  Well, I wanted to change her life with a memorable apple crisp and I thought Betty would for sure come through for me, since this is a basic, but delicious recipe.  NOTE: I don't normally make my crisp this way, but whatever.  I stayed true to the recipe for the sake of the series!

Apple Crisp, from page 177 of Betty Crocker's Cookbook, 1969 version

4 cups sliced pared tart apples (about 4 medium)
2/3 - 3/4 cup brown sugar, packed
1/2 cup flour
1/2 cup oats
3/4 tsp cinnamon
3/4 tsp nutmeg
1/3 cup butter or margarine, softened

Heat oven to 375F.  Grease square pan, 8x8x2".  Place apple slices in pan.  Mix remaining ingredients thoroughly.  Sprinkle over apples.  Bake 30 minutes or until apples are tender and topping is golden brown.  Serve warm and, if desired, with light cream or ice cream.

I thought this was pretty good.  It was definitely crispy and crunchy.  The flavour and texture was great.  I served it with a bit of whipping cream.

R's verdict: it was "OK."  Well, I guess I didn't change her life after all. 

R's mom, T, loved it though.  We almost ate the whole pan that night.

Wednesday, November 11, 2009

Apple Pizza

This is the second recipe I've made from Lucy Waverman's A Year in Lucy's Kitchen. The original recipe calls for plums, but I don't like plums and a had a whack of apples on hand that my dad had acquired from his neighbour. The original also specifies an 8" springform pan, but I only have a 9" and so I decided to make this into more of an apple tart, using my 9" ceramic tart pan (there was too much crust for my 8" tart pan with removable side to accommodate). I was attracted to this recipe because of its simplicity - which is what this book is all about. The end result was marvelous! This was a lovely tart and I'll for sure make it again.

Apple Tart (adapted from Lucy Waverman's Plum Pizza recipe on page 208 of A Year in Lucy's Kitchen)

Crust:

1 cup all purpose flour
1 tbsp granulated sugar
1/4 tsp salt
1/2 cup unsalted butter, cubed

- sift dry ingredients together and add butter, cutting in to make a coarse meal. press into tart pan. bake @ 350F for 15 minutes or until lightly golden.

Filling:

4 apples, peeled & cored, & sliced in to thick slices
1/2 cup granulated sugar
1/2 tsp cinnamon
2 egg yolks
1/2 cup whipping cream

- toss apple slices with sugar & cinnamon. arrange over crust.
- whisk yolks & cream; pour over apples
- bake @ 350F for 35 - 45 minutes, or until custard is golden & apples are softened
- serve & enjoy!

Like I said, this was wonderful! I even ate it for breakfast one morning!

Monday, September 14, 2009

Magazine Monday #49: Apple Tart

This is what I was hinting at on Friday's post about the transparent apples: Apple Tart. This is such a simple recipe I almost didn't think it would be all that spectacular. I couldn't have been more wrong, and making this brought home the lesson "less is more."

Recipe is here, from a back issue of Bon Appetit.

The crust recipe alone was an excellent discovery, and I used it in another upcoming post, and think it's a great go-to recipe for when you just need a simple single-crust pastry recipe, or a quick base for squares.

I didn't make the caramel sauce - I didn't have any whipping cream and I was lazy. So, instead, to give this some extra flavour, to keep the apples moist, and to add some visual appeal, I brushed the baked tart, still hot out of the oven, with melted butter. This melded wonderfully with the spices in the filling.

This is a very quick, very easy recipe to put together, and the results are elegant. And they also make a great breakfast, with some vanilla yogurt. Trust me!

OK, so this is my last time hosting Magazine Mondays, and Ivonne will be back next week. I want to thank all of you who participated for sending me their links! It's been a slice, guys!

Also, just to let you know, I'm away most of this week, so you will be enjoying posts courtesy of Blogger's scheduled posts feature, but I won't be around visiting at least until Friday. Have a great week!

Joining me this week with their Magazine Monday contributions are: no one. *sniff sniff*

Friday, September 11, 2009

Transparent Apples & Magazine Monday Reminder

First, the reminder: Monday is once again Magazine Monday, and this will be the last time I host, as our usual host, Ivonne of Creampuffs in Venice, will be back from her travels and will return to her MM hosting duties for the Sept. 21 edition of MM. So, if you've made a magazine recipe recently and would like me to feature it in my own MM post on Monday, send me an email at wandering_coyoteATyahooDOTca with the link to your post and I'll include it.

Onto apples. It's apple season here, and the other day my roommate said she'd spoken to the neighbour, who owns the house right next to ours, and the neighbour said we were welcome to the apples on the tree there. I didn't realize they were ripe as they were still a pale green colour, but apparently, that's just the variety. My roommate, J, said that she & her family call this particular type of apple "transparents" and some of her family members say that these transparents are excellent for apple sauce and apple pie. So, off I went to pick a bag full and bring them home.

The tree was absolutely laden with apples, and there were lots of the fruit on the ground, too. The apples on the tree were in generally good condition, not very wormy-looking. But it appeared that I'd gotten there a tad bit too late, because some of the fruit were rotting on the tree and the apples left were very soft. I picked a cloth grocery bag full and took them off home, where I planned on turning most of my booty into apple pie filling. I'm not a huge user of apple sauce, and I thought it would be cool to have some pre-made, homemade apple pie filling around over the winter for pies & crumbles.

Well...I had good intentions, for sure. But the apples wouldn't co-operate. After peeling & corning for what seemed like ages - and soaking the peelless apples in a lemony water bath to keep the browning at bay - and then slicing, I had two pots full of apples.

I added a bit of water, and a cup or so of sugar and brought the apples to a boil. I didn't think they'd disintegrate into much so quickly or easily. I added ginger, cinnamon, all spice, and nutmeg, and let them simmer. I then made a slurry with some flour (cornstarch thickened stuff sometimes doesn't freeze well) and added it to the bubbling apples. The mixture tightened up right away, so I put the whole sha-bang out on the porch to cool down as quickly as possible. This attracted some wasps, even though the lid was firmly on the pot.

Here is what the end result looked like:
And here is the pie filling ready to freeze. I got 14 cups plus a little left over for snacking on.
Yes, it's mushy & doesn't look like the greatest pie filling in the world, but it'll do, and I was grateful for the free apples!

I also made a tart with the apples, but that is for an upcoming post, so you'll have to wait & see the results (hint: excellent)!

Thursday, September 03, 2009

Pear & Apple Crisp for a Crowd

My lastest work project on the dessert front included a huge bag of locally grown pears, picked by the folks at the residents.
The cook and I mulled over the possibilities we had within our bugetary limitations, and decided simple was best: pear crisp. Who doesn't love a good crisp? And my strawberry rhubarb one from a couple of weeks ago was a hit, so we thought it would be a good bet. (Incidentally, the chocolate strawberry shortcakes were also a HUGE hit!)

What I hadn't anticipated was the nuisance of peeling all the pears, and I had some time restrictions to work around. After I'd made my daily muffin quota, I had to peel like a maniac to get enough pears for a crisp that had to feed about 35 people. The cook helped me peel, but I knew it wasn't going to work. Luckily, there was a whole bucket of apple pie filling in the fridge, so I decided to make this a pear & apple crisp.
I gave myself 35 minutes to peel as many pears as I could. To this I added 1 cup of brown sugar, 4 tbsp cornstarch, and some cinnamon & nutmeg.
Then I scooped in a whole pile of apple pie filling. This stuff is so good I could just eat it by the spoonful!
I then mixed the pear & apple fillings together in the pan.
Onto the topping: 4 cups oats, 1 cup flour, 1 cup packed brown sugar, cinnamon & nutmeg, and about 1 1/4 cups cold margarine (no butter at this place, but I make do).
It smelled great as it cooked, let me tell you! Alas, my shift ended before it came out of the oven, so I'll have to wait for my next shift to get any feedback. I'm pretty confident that they liked this, though!

Thursday, February 05, 2009

"What To Do With A..."#3: Apple Mincemeat Crumble

I totally realize that mincemeat is an acquired taste and that it's not everyone's cup of tea. Most of my family loves it though, and I always make a huge batch of mini mincemeat tarts at Christmas time. They never last long. The PC mincemeat I purchase comes in a 700mL jar, and I always wind up with a scant cup or so left over after making 4 - 5 dozen mini tarts. Mincemeat is full of sugar and booze so it'll last forever in your fridge - even until next Christmas. But, since I share a fridge with my roommate, it's within my best interest to move the bits and pieces of left over stuff out ASAP. On Sunday I went over to my brother and SIL's for dinner and offered to bring dessert. After agonizing about what to bring, I decided to opt for something simple and remembered this recipe for mincemeat crumble from Canadian Living. I also remembered my little bit of left over mincemeat in the fridge, waiting for me to transform it into something yummy. This recipe is my adaptation of that CL recipe, and I've actually made it before, in 2007, when I had a similar amount of left over mincemeat after making the Christmas tarts. It was a hit.

Apple Mincemeat Crumble

4 cups peeled, sliced apples (I used these, which made this super quick and easy for me)
about 1 cup or so of mincemeat
1 tbsp corn starch
2 tbsp sugar
2 tsp lemon juice

Crumble topping:
1 cup oats
1/2 cup whole wheat flour
1/4 cup brown sugar, packed
1/2 tsp cinnamon
1/2 cup butter at room temperature

Combine apples, cornstarch, sugar, and lemon juice in a mixing bowl. Add in the mincemeat. Place the mixture in a greased or parchment-lined 8" square baking pan.

For the crumble, combine all dry ingredients. Break up the butter into small pieces and, using your hands, combine with the dry ingredients until crumbly. Put on top of apple mixture. Bake at 350F for 35 - 45 minutes, or until golden brown and the filling bubbles up through the topping.

My brother had a jar of double Devonshire cream kicking around, so we served the crumble with it and it was delish!

Enjoy!

Friday, November 21, 2008

More Muffins

Yesterday at work, I made more muffins (we go through a lot every week). I started off with 3.5 dozen Fruit-fulls again, and then made a large batch of apple muffins.

These are super simple. They are a variation of a basic recipe we use there that can be adapted in a whole bunch of ways, and I got nearly three dozen commercial-sized muffins in the end. The recipe that follows is the recipe we use at work, but if you want to make them at home, just use 1/3 of a recipe.

Apple Muffins

12 cups flour
6 tbsp baking powder
3 tsp salt
12 eggs
6.5 cups apple sauce
4 cups packed brown sugar
2 cups veg. oil
6 tsp vanilla

Combine dry ingredients in a really large mixing bowl and make a well in centre. Combine the wet ingredients in a medium bowl and add to the dry ingredients. Stir to combine. Bake at 350F.

Saturday, September 20, 2008

Abundance of Apples

Along with picking hazelnuts last Monday, I also picked myself about 15lbs of pretty much organic apples from C&R's trees. Because they are unsprayed, many were quite wormy, but I managed to get enough to see me through the winter.

I'm not the hugest fan of apple sauce, so I didn't make any, but I did slice and freeze apples that can be used in all kinds of other baking, so I am pretty stoked.

I think these are Macintosh apples, but am not entirely sure. I am sure that they are juicy, and simultaneously tart and sweet.

In order to freeze the apples, first I cored them and cut them in half. I then put them in a bowl of cold water with about 1/4 cup lemon juice. This is a trick I learned in culinary school, where we frequently needed to hand-slice large amounts of apples for whatever it was we were baking. As we sliced, we put the apples in a bowl of lemon water, and the citric acid in the lemon juice helps to slow down the browning that occurs when apple flesh meats air. It doesn't completely stop the browning, but it does reduce it.

After that, I sliced the apples and put them in freezer bags in four- and two-cup batches, making sure to label the bags and press out any air left in the bag. I got 26 cups of apples out of this little endeavour! Excellent haul, if I do say so myself. I am now set: I have hazelnuts, apples, and blueberries nicely packaged and frozen for my winter baking needs. And, the apples and hazelnuts were local and organic to boot. The blueberries are from BC, which is local enough for me.

Incidentally, the local overpriced grocery store is still out of lemon juice, so I borrowed some from my roommate who got a bottle before the shortage. I have no idea when we'll see lemon juice back on the shelves, but I do hope it's soon. They are selling lemons for 79 cents each and I think that's pretty much akin to highway robbery.

Sunday, March 26, 2006

Apple Rhubarb Crisp


IMG_0791
Originally uploaded by wanderingcoyote.

I know crisps are traditionally fall fare when apples are plentiful, and I know that rhubarb is not quite in season, but I made this today because Granny Smiths (the best baking apple ever) were on sale, my roommate, J, had rhubarb in the freezer, and I wanted to make a dessert to compliment J's roast chicken dinner.

Funny story about the rhubarb. It came from the neighbour's plant last year. J took some to a coworker who claimed it was the best rhubarb she'd ever tasted. When the coworker asked the rhubarb plant's owner if she could have a cutting of the plant to grow in her own garden, the lady said no way. It's a weed, right?

Speaking of which, we had a huge rhubarb plant in our back yard when growing up. I mean huge. My mom made rhubarb everything when we were kids, and it took a while for it to grow on me. My brother, on the other hand, hated the stuff. One spring, my dad and brother were out doing yardwork and my dad entrusted my brother with the weed killer to eliminate some pesky dandilions etc. Well, my brother went to town with the weed killer and sprayed it on the rhubarb plant. We had no rhubarb that year and my mom was pissed off. But it came back the next year! And, I hate to say it, we ate that rhubarb. I shudder to think what chemicals were floating around my body afterwards, and hope I don't get any cancer as a result!

So here's what I did this afternoon.

Apple Rhubarb Crisp

4 Granny Smith apples, peeled & sliced
approximately 3 cups chopped rhubarb
4 tbsp cornstarch
2 tsp ground ginger (or to taste)
2 tsp cinnamon (or to taste)
1/2 cup sugar (or to taste)

Topping:

I cup oats
1/3 cup whole wheat flour
1/3 cup brown sugar
cinnamon & ginger to taste
1/3 - 1/2 cup butter

Combine rhubarb & apples in a bowl. Add the cornstarch sugar and spices. Toss to coat thorougly. Chuck in a large casserole that has been well-oiled.

For the topping, combine the oats, flour and sugar. Add the spices. Cut the butter into in the mixture either with a pastry cutter or by rubbing the butter into the mixture with your hands. It should be crumbly and just hold together when squeezed. Sprinkle on top of the fruit and pat down gently.

Bake at 375F for 45 minutes to an hour, depending on the thickness of your apple slices and the depth of your casserole dish. You know it's done when it's bubbly and when you spear it with a sharp knife, the apples are tender.

Vanilla ice cream is a wonderful accompaniment, as is just straight whipping cream poured over the top. My mom used to serve this with evaporated milk poured over it.

My mom always claimed that by adding ginger to rhubarb it eliminated the feeling that you're teeth were sticking together, a sensation she claimed she had when eating rhubarb without ginger. I don't know about this. I've eaten rhubarb without ginger before and didn't have this experience. But they are a good combination nonetheless.

Rhubarb is quite tart, so don't skimp on the sugar. Taste the mixture after you've added the sugar to make sure it's sweet enough for you. Don't eat the raw rhubarb, but there should be some juices in the mixture at this point, so taste that.

We make strawberry rhubarb pies at work, and you can make a strawberry rhubarb crisp, too. Both fruit will be plentiful this summer.

Enjoy!

Friday, January 27, 2006

Apple Crisp Cheesecake

Time for another cheesecake recipe. I am a cheesecake freak, and in all honesty, it's really one of the easiest desserts to make. You just have to follow a few guidelines, which I posted previously here. This recipe is spectacular, I must say. It's great as a fall dessert, for obvious reasons, but it's great all year round. I find the best results are with Granny Smiths because of their tartness and they keep their shape when baked, but Golden Delicious also work very well.

Apple Crisp Cheesecake

Crust:
2 cups graham cracker crumbs
1 cup quick oats
1/3 cup packed brown sugar
2/3 cup butter, melted

- combine these ingredients and press into a 10" springform pan, building the crust 1 1/2" up the sides of the pan. Chill.

Topping:
1/4 cup quick oats
1/4 cup packed brown sugar
1/4 cup all purpose flour
1 tsp cinnamon
2 tbsp butter

- combine in a small bowl until crumbly and set aside

Filling:
3 packages (250g each) cream cheese (light would probably work but DO NOT use fat free), at room temperature
1 cup packed brown sugar
3/4 cup sour cream (again, light would probably work but DO NOT use fat free)
4 eggs
1 3/4 tsp cinnamon
1/2 tsp nutmeg
2 small apples, sliced and peeled

- beat cream cheese, brown sugar, and sour cream in a large bowl on medium speed until well creamed. Add the eggs, one at a time, beating well after each. Ad spices and combine. Pour into crust. Spread apples over filling. Sprinkle on the topping.
- bake at 325F for 65 - 70 minutes, or until soft set in the centre. Immediately run a knife along the edge of the cake to loosen it from the pan, then cool completely on a wire rack. Chill overnight, or at least for a few hours.

See? Easy and spectacular. Serve with a caramel or butterscotch sauce. This cake also freezes well, if you want to make it in advance, and it should yield 16 servings. Enjoy!

Sunday, June 12, 2005

Apple Phyllo Cups


applephyllo
Originally uploaded by wanderingcoyote.

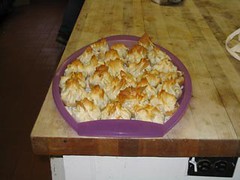
I made these at work this week and they were a huge hit. The other staff kept coming into the kitchen and looking in on me as I made these up, all saying, "We never get stuff like this here!" Indeed. I have seen what they're used to in terms of baking and I'm not surprised they're easily impressed.

These are super easy to make and make quite an elegant dessert or snack. They can be plated up with a rasperry coulis or just eaten cold. We made something like these in school, which is where I got the idea.

Here's what you need:

- about 2lbs of apples, preferrably Granny Smiths because they're nice and tart and keep their shape during the cooking process
- some lemons (juice and zest)
- cinnamon, ground ginger, nutmeg, allspice, cloves - all to taste
- melted butter
- raisins if you like them
- candied citrus peel, if you like it
- left over cake crumbs, cookie crumbs, or even bread crumbs (not entirely necessary but a good idea if your filling is too liquidy)
- a package of phyllo pastry, thawed
- muffin tin

Get yourself a large bowl and fill it with water. Quarter a lemon or two, squeeze out the juice and throw the quarters and juice into the bowl. This will keep the apples from turning brown. Peel & core the apples and place them in a bowl of water as you go. When they're all done, dice them roughly. Place in a saucepan with about a cup of water and bring to a boil. Add your spices, raisins, and peel, if using. Add the juice and zest of another lemon. Simmer until the apples are tender, which should take about 5 - 10 minutes, depending on how big you cut them. Add about 2 tbsp of cornstarch dissolved in an equal amount of cold water. Stir until thickened and bubbly. Remove from heat.

You'll need to make your cups about 4 - 6 sheets of phyllo thick. Lightly grease the muffin tins with melted butter. Very carefully separate your sheets out and cover the remaining phyllo with plastic wrap; it dries out quickly and it must be covered when you're not working with it. Now separate the phyllo into 2 - 3 layers each and brush lightly with melted butter; put your layers back together. Depending on how large your muffin cups are, cut the phyllo with a sharp knife into squares as best you can. The corners should come up well over the sides and when you press the middle into the bottom of the tin, and should be tall enough when pulled to gether to form little points. Rectangles are ok, and often inevitable. You can move around your phyllo layers to make the points work, but make sure the sides are high enough to accommodate the filling. You don't want any leaks or you'll never get these out after baking.

Check out your filling. If it's liquidy, you'll want to put in your crumbs to absorb some of the liquid and help prevent the filling from making the phyllo mushy. Or, add an extra layer or two of phyllo. Put a bit of filling in, enough so that you can pull the corners of the phyllo over the top and twist closed. Twist close, and work quickly from now now on so the phyllo doensn't dry out. When you've completed making the cups, brush the tops with some more melted butter. Bake at about 375F until just golden brown on the tops. Lift one out carefully to make sure they're golden on the bottom. Remove immediately from the muffin tins, preferrably with tongs, and cool on a wire rack. This step is essential, or the steam will turn the cups mushy on the bottom.

Serve warm or at room temperature. Creme Anglaise and ice cream would be lovely with this, as would the aforementioned raspberry coulis. Do not store in the fridge; the humidity will make the phyllo go soft.

Notes to the readership.

1. Work very, very carefully with phyllo as it is extremely fragile. Also, as I mentioned, it dries out quickly, so make sure you have your filling and muffin tins all ready to go before you cut your phyllo up.
2. Deeper muffin tins are better than shallower ones, just for the sake of presentation and use of phyllo, but use what you have on hand.

Enjoy - and as always, let me know what you think!

Sunday, May 01, 2005

Two Grain Cranberry Bread

This is a fantastic breakfast item full of fibre and flavour. I usually have it with some cheese to add some protein.

1/2 cup butter, softened
2/3 cup brown sugar
2 eggs
1 cup quick oats
1 cup all purpose flour
2/3 cup whole wheat flour
1/2 tsp each baking powder & baking soda
1/2 tsp salt
1/4 tsp ground cloves
1 cup dried cranberries (Craisins)
1/2 cup chopped pecans, toasted
1 1/4 cups unsweetened applesauce

1. Preheat oven to 350F. Prepare a 9"x5" loaf pan - grease & flour, or grease & parchment (what - you haven't bough parchment paper yet? C'mon!).
2. In a large bowl, beat the butter and sugar until fluffy. Beat in eggs, one at a time. Is this sounding familiar?
3. In a separate bowl, whisk together oats (reserving 2 tbsp), flours, baking soda, baking powder, salt, and cloves. Add cranberries & pecans. Stir into butter mixture alternately with applesauce, making 3 additions of oat mixture and 2 of applesauce.
4. Scrape into loaf pan. Sprinkle with reserved oats. Bake approximately one hour or until tester comes out clean. Let it cool in the pan 10 minutes before turning it out onto a wire rack to cool completely.

Notes to the readership:

- Hmmm...I have no notes this time. That's a first! If you have questions, you know what to do.

LinkWithin

Blog Widget by LinkWithin