I made so much bread in school it wasn't even funny. I got extremely sick of it, yet the good thing about making so much of it so often (we made 9 batches of croissant dough daily, a dozen loaves of bread daily, baguettes and epis almost daily, and several dozen buns daily - and I'm sure I'm missing something! Oh yeah, a dozen large cinnamon buns made from brioche dough daily) is that whipping up a batch of bread for my single self is no big deal at all. It's easier for me than tromping off to the store in the snow and cold. That, and I find making bread, in small quantity and by hand, quite a theraputic and satisfying task. I'm tactile; I like the feel of kneading dough by hand.
The school recipes for bread used a starter we made from a potato and an onion, a bottle of beer, and flour and water. I haven't made my own starter because I'm moving soon and don't want to go to the trouble. That, and starter, once you get it going, can be rather like a pet: it needs regular food, water, and TLC. Only it ain't cuddly and it doesn't purr.
Bread involves very simple ingredients: water, flour, salt, sugar, yeast. Sometimes you can use milk instead of water, which adds flavour and nutritional value. Salt is always necessary in breadmaking because not only does it add flavour, but it inhibits the yeast growth so your bread doesn't go crazy in the proofing (i.e. rising stage). Sugar is also necessary, because it feeds the yeast; some recipes don't require it, but follow the recipe. Other sweeteners can be used, too, like honey or molasses. All purpose flour is just fine, but if you can get yourself some good bread flour, you'll get an even better result because there's a higher gluten content in bread flour, and gluten is what makes your dough elastic and your bread rise higher.
Here is a recipe I've used that has given me good results. It's from the Fleishmann's
Best Ever Breads recipe book that my mom gave me a few years ago, when she taught me how to make bread for the first time. For more tips and details,
this is a great site.
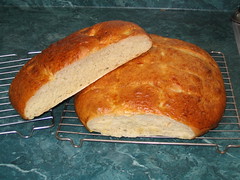
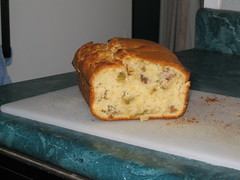
Basic White Bread (yield = 2 loaves)
5 - 5 1/2 cups white flour
3 tbsp sugar
2 packages quick yeast (8g each, or 1 package = 2 1/4 tsp)
1 3/4 tsp salt
1 1/2 cups water
1/2 cup milk
1 - 2 tbsp butter or margarine
Combine the dry ingredients in a large bowl. Heat the water and milk and 1 tbsp of the butter to very warm. Gradually add it to the flour mixture to form a soft dough. You don't want it to be too sticky, nor do you want it to be too stiff. Depending on the humidity of your surroundings, you may need to add liquid (or reduce the flour) or add some flour. Sometimes you won't need the full five cups of flour, sometimes you might need the full 5 1/2. That's part of breadmaking and it may never be the same way twice.
Now, I have a
Kitchen Aid mixer and I do this first part, and some of the kneading, in it. I don't want to overwork the motor, even though it's got high wattage, so after the ingredients are combined, I develop the dough for a while on a higher speed, then finish it off by hand. If you don't have the luxury of a stand mixer, kneading the dough by hand until it's smooth and elastic might take you 8 or so minutes.
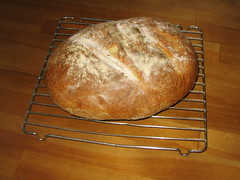
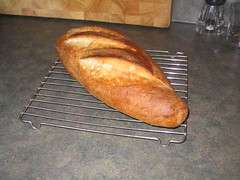
Once the dough is developed, let it rest a few minutes while you clean up, then shape it or put it in a loaf pan and allow it to rise. I do this in the oven with the light turned on and a pan of boiling water in the rack below. I turn the oven on to warm for a few minutes, then turn it off, leaving the light on. Also, brush some melted butter over the exposed parts of the dough to keep it from drying out. Once the dough is doubled in size, preheat your oven (removing the dough if you're rising it in there!) to 400F. High heat gives your bread the extra bit of push from the yeast before the yeast completely dies off. You can score your loaf if you wish, with a sharp knife or razor blade. Put your bread in the oven with a pan of boiling water and bake until golden brown and it sounds hollow when tapped on the bottom.
This is an excellent site that gives detailed instructions for the steps above.
Commercial bread ovens like the one I used in school have a steam injection function. Steam helps give the crust crunch and shine, and helps the dough retain its moisture. You won't get as much from the pan of water in the oven, but it's worth the extra bit of effort, in my opinion.
There are millions of bread recipes out there. Let me know how this one works out, or if you have any others you've had good results with that you'd like to share.


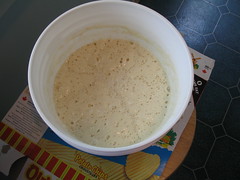

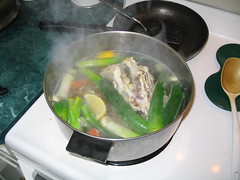
 It's important at this stage to adjust your seasonings. I found I had to add about a teaspoon of sugar to cut the sourness of the lemon, and I had to add a bit more salt. But after an hour, the stock tasted pretty good. I took out the chicken breasts and strained the stock through a fine sieve. I cut the chicken meat from the bone and added it back to the stock. I also kept the garlic cloves and cut them up for the broth; I love how mellow garlic becomes once cooked gently like this. I brought it all to a boil once more and threw in about 1/4 cup of parboiled rice (as a rule I don't use parboiled, but I had some kicking around from my work's kitchen and it has less starch in it so it worked well). I added more garlic, freshly pressed, and after about 20 minutes, I had soup.
 Usually, when making stock, I simmer the bones and aromatics for the better part of the day. This was a super-quick version that turned out well. All I needed was something quick and soothing on a wintry, yucky day, and this hit the spot. I'm sure over the next couple of days the flavours will meld a bit more.
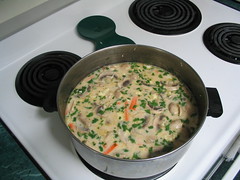