Saturday, February 12, 2011

Corset Cookies = Awesome!

I just did a post here about my love of corsets, and one of my readers sent me a link to this photo:


OMG! These are awesome! I want one badly - very badly! Think of all the decorationg possibilities! I am going to have to see if my local kitchen store can find me one of these cutters! These have got to be some of the prettiest cookies ever, too. The piping is amazing and took considerable control and experience. Whoever thought of this deserves a some kind of big giant cookie award.

Friday, February 11, 2011

Cadbury Mini Egg Ice Cream

In a fit of premenstrual pique last weekend, I purchased a 1kg bag of Cadbury mini eggs. It felt so evil, but they are so good! I just finished the bag off now, and let me tell you, it took considerable will power on my part to not inhale the whole bag within a day of purchase.

I didn't eat them all in their natural state, however. I had a brain wave during my PMS craziness: ice cream! Why not? I am out of store-bought ice cream and it's so frakking expensive here for the good stuff and the stuff I like that I'm not going to buy it. But it's cheap as hell to make, so make it I did! And the results were excellent!

Cadbury Mini Egg Ice Cream

2 cups whipping cream (35%)
1 cup whole milk (3%)
3/4 cup sugar
3 vanilla beans (I have a package I'm trying to use up because they're getting dry, so that's why I used this many)
1 cup chopped Cadbury mini eggs

This is my typical ice cream recipe (minus the mini eggs, of course). I just combine the cream, milk, sugar, and vanilla, really well in a large measuring cup, and pour it into my ice cream maker. Close to when the ice cream is ready to come out of the machine, I added the chopped mini eggs. Freeze till firm. And Bob's your uncle!

The shells turned the final product a bit of an odd colour, but that's OK. It tastes great!


I may need to buy another bag...

Tuesday, February 08, 2011

Dill = Awesome

My AeroGardens continue to produce awesome stuff, providing some much needed zazz to my diet. The dill has done tremendously; I couldn't be happier with it. And I finally got around to using it tonight.

I inherited some nice baked potatoes from a catering job I did over the weekend, and this was very exciting because A) they were free, B) I didn't have to bake them myself, and C) I immediately knew what I was going to do with them once they were in my hot little hands - and I knew that my plans would involve dill.

I have felt a need for a shot of summer now that we are in the dead of winter, and nothing says summer more than potato salad! With lots of dill!

Very simple:

2 large baked potatoes, cubed
4 green onions, chopped
2 hard boiled eggs, chopped
2 small carrots, chopped
a whole bunch of dill, chopped
enough mayo to bind everything just nicely

And voilĂ :


Sooooooo looking forward to this winter being over and done with. In the meantime, I have another use for my dill, also inspired by the catering I did on the weekend, but that is a post for the near future!

Monday, January 31, 2011

"Say Yes to Noh!"

Best motto ever!

It comes from this company, Noh, which makes a whole bunch of Hawaiian mixes, one of which, the Haupia Pudding/Luau Dessert AKA Coconut Pudding, arrived in a nice box from that fair State, along with the macadamia nuts I've been making cookies with, courtesy my friend Jodi. Tonight, needing a sugar fix very badly, I made the pudding mix. It was dead easy, being one of those "just add water" jobbies.

The picture on the package doesn't look much like a pudding, however; the little squares of whiteness look like something much thicker than a pudding, but in the fine print on the package, the word "flan" is used. That's more like it. The pudding, once cooled in the fridge, set up in a very solid, flan-like way. You could cut it into any shape you wanted to.

The verdict: weird! Very weird! Solid, and not creamy the way a flan normally is. I guess that's not surprising given it only required me to add water to it. But it was also quite flavourless, which was disappointing; it tasted bland and watery. I added some chocolate chips to mine just to make it more interesting, but I still couldn't finish it in the end.

Oh well! It was still a bit of a tropical, cultural experience in my Canadian winter surroundings, so that alone was worth it.

Incidentally, the package also says this makes a great topping for cakes, but I wouldn't go there. I also don't think it would be good warm on ice cream, as the package also suggests. Go with Jello pudding instead!

Sunday, January 30, 2011

AeroGarden Herb Usage #1

My AeroGardens continue to pay off and today I harvested some herbs and made a dish I've been craving for a while.

I have a TON of dill ready to pick, I just need to feel inspired to use it. The mint and the basil, however, was another story. I have no idea what brought on a craving for Asian salad rolls, but a craving I did have and as soon as the mint was big enough I was in business. Mint goes for $1.99 for a small package, and fresh basil is the same. The herbs were delicious!

My salad rolls contained both mint and basil, and also lettuce from my lettuce garden. Also in there was rice vermicelli and shrimp. The sauce I used was the Vietnamese-Must Have Table Sauce (AKA nuoc cham) from Hot Sour Salty Sweet. This is an awesome sauce: fresh and zingy and it went perfectly with the salad rolls. The original recipe contains a bird chile, but I A) don't have access to such a thing and B) don't like spicy.

Vietnamese-Must Have Table Sauce (page 28 of Hot Sour Salty Sweet by Jeffry Alford & Naomi Duguid)

1/4 cup fresh lime juice
1/4 cup Thai fish sauce
1/4 cup water
2 tsp rice or cider vinegar
1 tbsp sugar
1 small clove garlic, minced

Combine!

Awesomeness! Go AeroGardens!

Saturday, January 22, 2011

Macadamia Nut Cookies

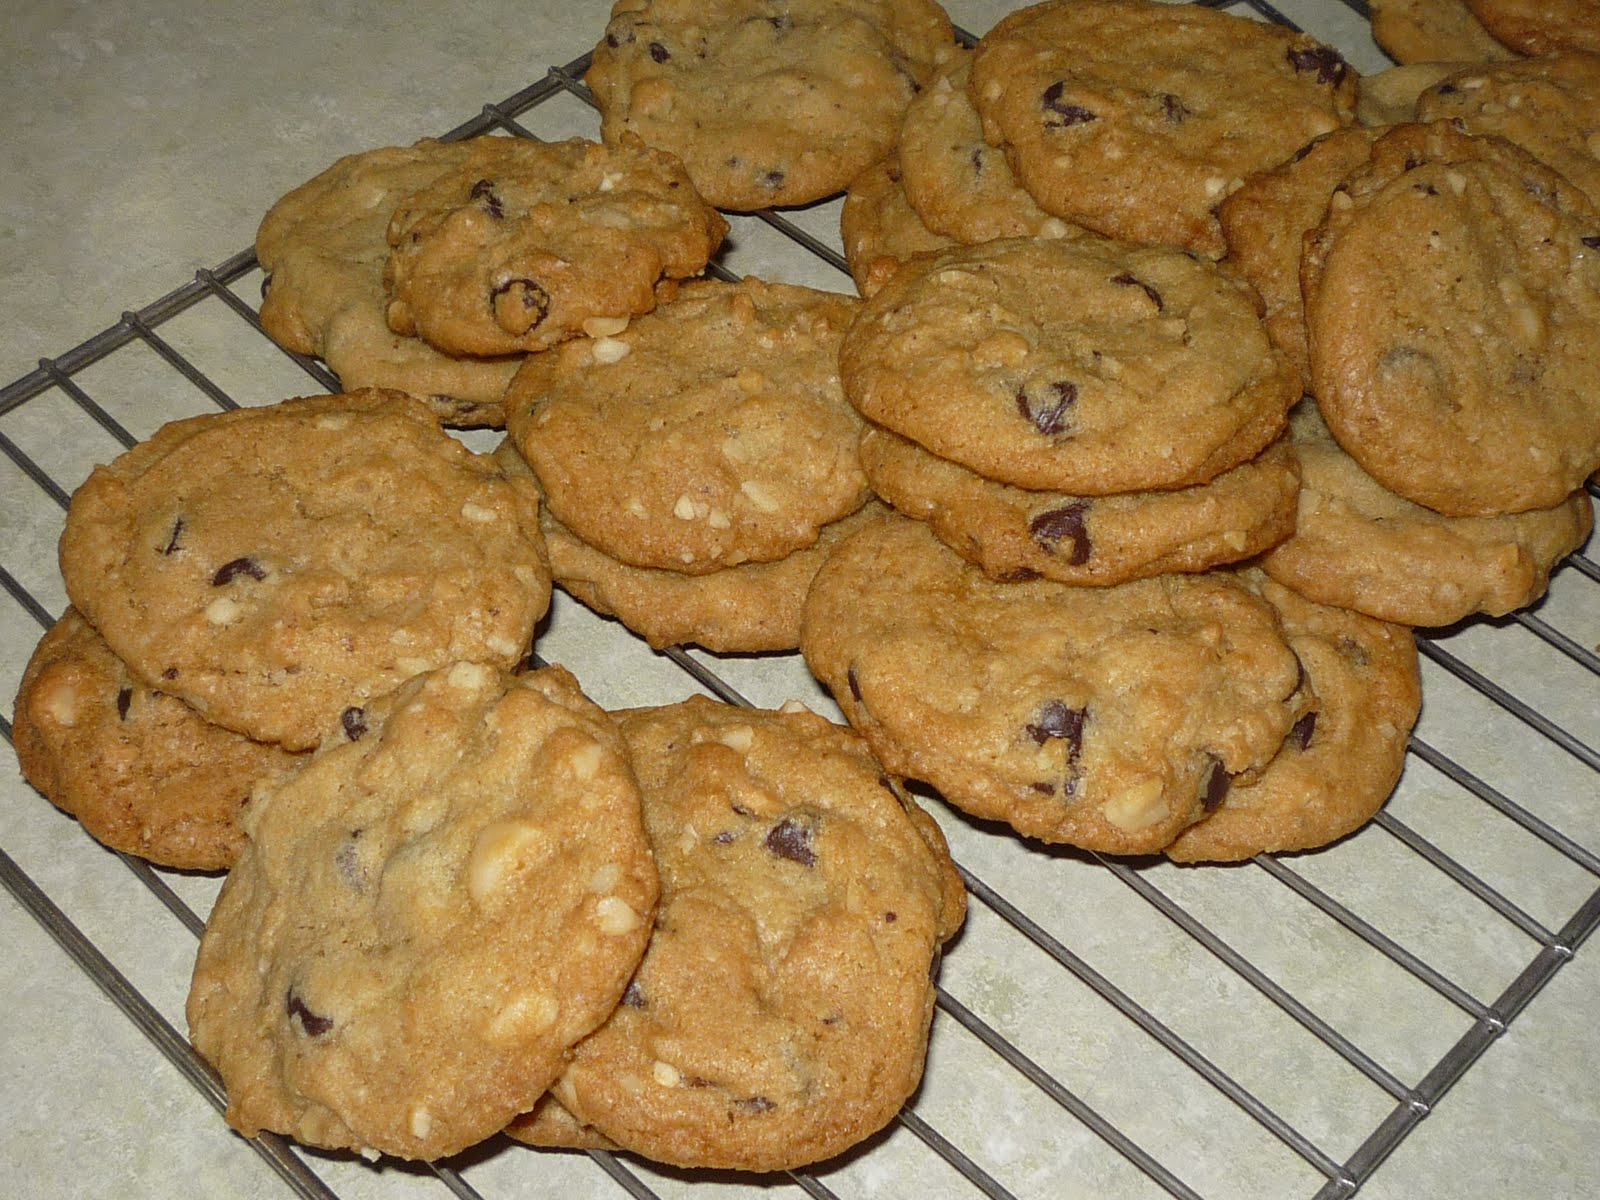
In December, my good friend Jodi went to Hawaii for a holiday and sent me a really nice box of Hawaiian goodies. It included all kinds of macadamia nut products, including a couple of bags of Mauna Loa dry roasted macadamias with sea salt. Oh my God - yum! I love these! They are not too salty, which is great, and as such they make a great addition to baking, adding just a touch of saltiness to the sweetness of cookies. I have made two batches of cookies - so far! I have almost a full bag of nuts left, too, so there should be more on the way!

Chocolate Chip Macadamia Nut Cookies

2 1/4 cups all purpose flour
1 tsp baking soda
1 tsp salt
1 cup butter, softened
3/4 cup packed brown sugar
3/4 cup white sugar
1 tsp vanilla extract
2 eggs
2 cups chocolate chips
1 cup coarsely shopped macadamia nuts

Bake at 350F.

Oatmeal Coconut Macadamia Butterscotch Chip Cookies

2 cup butter, softened
2 cups packed brown sugar
2 eggs
2 tsp vanilla extract
1 3/4 cup all purpose flour
1 tsp baking soda
1/2 tsp salt
3 cups quick oats
1 3/4 cups butterscotch chips
1 cup unsweetened flaked coconut
1 cup coarsely chopped macadamia nuts

Bake at 350F.

Both cookies were awesome!

Saturday, January 15, 2011

At Last - Salad!

My AeroGardens have come through! Yesterday I harvested the first lettuce from my lettuce AeroGarden, and I made a nice fresh salad for dinner. While purchasing the other salad ingredients in LOGS, I gave the lettuce section in the store the finger!


The AeroGardens have been growing for 32 days now. Here are the herbs & tomato plants:

Friday, January 14, 2011

Magazine Monday (on a Friday) #73: Molasses Oat Bread

I'm trying hard to get back into making my own breads, just to keep my grocery bills low and to help me feel productive. For the last few weeks, I've managed to do this, and I'm also making two at a time so I can freeze one for later, too.

I came across this recipe for Molasses Oat Bread in the November 2010 issue of Canadian Living Magazine, in a segment on bread machine breads. I didn't use a bread machine, of course, just my regular method.

I'm not the biggest molasses fan in the world, but I fancied it for some reason. And it turned out quite well in the end. I didn't have any whole wheat flour on hand, so I just used white. It's sweet but not overly so, and will be just fine with a nice bit of ham & Swiss cheese!

Cooking with Kylie: Neil's Chilli-salt Squid!

I love Kylie Kwong, but her books are not cheap! I did get some Christmas money, however, so I treated myself to Kylie's Heart and Soul. As is the norm with Kylie, everything is so mouthwatering, and also very simple to make. I have a ton of recipes flagged in there, but I decided to make something that really grabbed my eye the first time through the book, Neil's Chilli-salt Squid, on page 35. The flavours really appealed to me, and I do love calamari. I don't have access to fresh squid, unfortunately, so in order to get any at all, I had to make a trip to the LOGS in Trail where they sell frozen squid in 1lb packages. It's times like these when I miss living on the coast...

The dish was very easy to put together, but I didn't think it was an incredible success. This wasn't the fault of the recipe, though, but more my execution of it. I had to shallow fry the squid because I didn't have enough oil, and I don't think I heated the oil enough. It was hot, but not as hot as I realize now it should have been. The squid didn't crisp up, and though the meat was done perfectly, the coating didn't stick. Next time I'll make sure I have the proper amount of oil, deep fry, and make sure the oil is much, much hotter. The flavour was there, though, and the oil turned a spectacular colour!

I served my squid with some baked fries and an Asian coleslaw.

The recipe is here.

Thursday, January 13, 2011

Epic Cabbage Rolls!

So, when my mood is in the crapper food, eating, meal planning, cooking, and grocery shopping all become very challenging for me. The last bout left me scrambling for meals and it wasn't pretty, so I decided during a sunny spell of three days and the resulting lift in my mood to get organized, get prepared, and start stashing meals in my trusty new freezer so that the next time I don't feel great, I'm not living on scrambled eggs and oatmeal and junky stuff that's easy to grab off the grocery store shelves.

Enter the humble cabbage roll. Actually, enter that show we get in Canada every afternoon called Best Recipes Ever. I was flipping around recently and decided to watch this; I'd kinda turned my nose up at it before because it's a Canadian Living thing and I already get the magazine and the subject matter is...well...cue the snoot...simpler than I prefer in a cooking show. But, there really was nothing else on so I gave it a go. And the chick made a vegetarian cabbage roll recipe that triggered some memories. My mom used to make killer cabbage rolls when we were kids, and also, my good friend and fellow foodie Mr. Anchovy, also posted eons and eons ago his mother's cabbage roll recipe. Mr. Anchovy comes from a Polish background and he has been known to post delicious recipes from that culture from time to time. A quick email to him asking about the cabbage roll recipe resulted in a quick response and a trip to the grocery store after the next pay day. All of that resulted in an epic cabbage roll afternoon.

It was as lot of fun, and in the end, after a few hours, I got 46 cabbage rolls, which for me turned into about 15 meals. Total cost of the meal = $15.21! So, my budget was pretty happy, too.

There were a few issues. I ran out of cabbage, so I froze the leftover filling I had for another time. Also, I got long grain rice from the bulk bin at LOGS because I didn't want to use a whole bunch of my pricey scented jasmine rice in this, and the rice was terrible. I have no idea what happened to it, but it cooked up into a pile of mush, and when the cabbage rolls were cooked, the absorbed so much liquid from the sauce that the rice went even mushier in the roll. That was disappointing. I seem to remember my mom using raw rice in her filling, but I need to confirm that. Certainly, I'd do that the next time given this experience.

I made a few amendments to Mr. Anchovy's recipe. His mom used salt pork, but I didn't want to go around looking for something like that in the boonies, but I did have on hand some fatty home-made bacon my dad's friend smoked for him and so I used that instead. Also, Mr. A's mom used to put a pork rib on the top of her cabbage rolls, but I didn't do that either (not really a fan). Also, the original recipe called for ground veal, pork, and beef, but I'm not a fan of veal, and while I was looking for a lot of cabbage rolls, Mr. Anchovy's claim that this recipe makes enough for the entire Polish army wasn't far from the truth, and I didn't quite need that many cabbage rolls. So, I stuck with only ground pork and ground beef). My mom used to put green peppers in hers, so I added some to mine, too.

So, here is the adapted recipe I used. And yes, that is a gigantic turkey roasting pan!

Epic Cabbage Rolls

2 - 3 cabbages
1lb each ground beef & ground pork
1/2 lb bacon, chopped
2 cups long grain rice, cooked
1 - 2 cans (the big ones, 1.36L) tomato juice
2 chopped onions
1 chopped green pepper
salt & pepper to taste
ground basil & dried thyme

OK...This really is quite simple!

Take your cabbage, and dig as much of the core out as possible without de-leafing it. Steam until soft - about 15 - 20 minutes. Now, I had to keep steaming the farther into the head I went, so you might have to do that, too. Alternately, I've heard of people freezing their cabbages, then as they thaw the leaves come right off. Keep some of the cabbage leaves to line the bottom and sides of your pan.


Brown all meats with onion & salt & pepper to taste. Add to rice and mix until combined.

Now make sure everything is cool enough to handle, because this is where the hands-on part begins. Trim the fibrous spine out of the cabbage leaves. This helps flatten them & makes them easier to roll.

Make your rolls like you would a burrito (this is how the host of Best Recipes Ever described the process). Take a small amount of filling in your hand, put it at the top of the cabbage leaf, roll, folding in the edges. Then place seam down in the pan. Repeat. Layer the cabbage rolls at will. Repeat.

I sprinkled the seasonings and chopped green peppers between the cabbage roll layers.


When you're all done rolling, pour the tomato juice right over top. Make a lid with cabbage leaves, which will help keep things nice & moist. I ran out of cabbage leaves...


Bake long & slow: 325F for 2 - 3 hours, or until nice & boiling hot. Mr. A says it's OK if the leaves on the top & sides start to brown; they are caramelizing & turn sweet. Mine didn't do that; my oven was very slow and I actually wound up cooking the whole thing for about 4 hours in total. Keep checking for dryness. If your rolls are looking at all dry, just chuck in more juice. Bear in mind that you are braising here, so you'll need plenty of liquid.

And, voila!

These freeze excellently...Here are all the fruits of my labour...

Woo-hoo! I am so set!

Full Flickr set here.

Many thanks to Mr. Anchovy for the recipe & the advice!

Chocolate Peanut Butter Biscotti

It shouldn't surprise you to find out that I was highly disorganized this Christmas and didn't actually have most of my home-baked gifts ready until Christmas afternoon. It's a long story, but I do have to thank the weather in part for helping me get it all done: the good old outdoor fridge was my ally and let my baking cool much more quickly than it would have had I kept it indoors. It was sunny but chilly, and the new deck's railing was the perfect size to keep the pans reliably steady.

I am in the habit of giving biscotti to C & R, my SIL's parents because they are big biscotti fans, and they have always told me how much they've enjoyed receiving it in the past. This year I made a double batch so that I could give some to my brother & SIL, too. Previously, I've made chocolate hazelnut biscotti and a lemon & sour cherry biscotti. This year, I chose to do peanut butter & chocolate biscotti.

It's always the same recipe, which I got from culinary school. It's fairly generic and therefore versatile.

Chocolate Peanut Butter Biscotti

85g butter
185g sugar
2 eggs
2tsp vanilla
300g flour
50g cocoa powder, sifted
1 1/2 tsp baking powder
1 pinch salt
1 or so cups of peanut butter chips
chopped toasted peanuts for sprinkling on top
about 1/4 cup or so dark chocolate chips or other dark chocolate, melted, for drizzling on the top

Cream butter & sugar. Add eggs, one at a time, then vanilla. Add the dry ingredients.

Knead the dough lightly and pat into a "half moon" shape for even cooking, about 3/4" thick. (The "half moon" thing is in the original culinary school recipe; it's a little deceiving. What that means is rounded sides and a slightly rounded top.)

Bake at 350F for about 20 minutes, or until the top is firm to the touch, dry and cracked-looking. Remove from the oven and cool slightly. Slice with a serrated knife, and then bake again until crisp and dried out - another 20 minutes or so.

Cool completely. Drizzle melted chocolate over the top and sprinkle with nuts.

Apparently, these were a huge hit!

Saturday, January 08, 2011

Dad's Birthday & Black Forest Cake

Steak & Kidney Pie and Black Forest Cake: probably two food items better not seen in the same sentence, but...

My dad has his birthday on Dec. 24, and though many people assume he gets stiffed with his day occurring in the midst of the biggest holiday of the year, the guy is actually spoiled freakin' rotten! We always have a great meal and I always make a special cake as per his request. The traditional meal for Dad's birthday is his favourite dish ever, Steak & Kidney Pie. Can we all say "yuck"? Yeah. We all detest it, but Dad's very British and this is our family tradition. I always associate raw kidneys with Christmas, because growing up when my parents were still married, my mom would buy a kidney from the butcher and soak it in the dishpan in the kitchen. It would ooze..."fluids." It was disgusting.

Now the pie is generally made by my SIL Shan and Dad gets the kidney. Here is a post from a couple of years ago about the making of the pie, including some detailed shots of Shan chopping the kidney up. This year, she couldn't do it. She just didn't have it in her, she told me. So she had my brother Jem do the chopping, and because kidney stinks like nothing you've ever smelled before, the filling for the pie was cooked entirely outside of the house: the kidneys were grilled on the BBQ and then combined with the other filling ingredients in a slow cooker that was placed in the far reaches of their garage.

Shan makes a great meat pie. This year, she did steak & kidney Guinness Pie for Dad and just a Steak & Guinness Pie for the rest of us. Our pie was great; Dad loved his version, too, and had plenty of leftovers to enjoy, too.

Here is Dad's pie, complete with his initials so there is absolutely no confusion about which pie is which!
And here is our pie, followed by a shot of the interior, and it was delicious. Shan knows how to make a mean meat pie, I can tell you that!

Now onto a more pleasant topic, Dad's cake! He requested a Black Forest Cake, and that's what he got. I made the cherry filling from scratch and it was absolutely amazing! I had wanted to get frozen cherries from the States, but bringing stone fruits, including cherries, across the border isn't allowed, and although I didn't know if that meant only fresh cherries and not frozen, I wasn't willing to take the chance, so I instead used a 720mL jar of sour cherries in juice purchased from LOGS (local overpriced grocery store).

Here is what I did. I didn't measure anything - sorry! Also, I had wanted to use kirsch as is traditional, however it's way too expensive for my modest budget and there weren't any minis available. So I used rum and it worked great.

Sour Cherry Filling

  • 1 jar (720mL) sour cherries, strained, juice reserved
  • a bit of sugar until I felt the sweetness was right, but not too sweet
  • some cornstarch mixed with the reserved juice
  • generous amount of amber rum, again to taste

- boil cherries & half of the reserved juice & add sugar to taste. With remaining cherry juice, add some corn starch & mix to dissolve. Add slurry to boiling cherries until desired consistency. You don't want it too liquidy but not too solid either as it will thicken as it cools. When desired consistency is reached, throw in some rum and combine. Let cool.

For the cake, I used my go-to cake recipe and baked it in a bundt pan. Because the dinner was being held in another town, I assembled the cake there for easy travel.

I cut the bundt in half lengthwise and spread in the filling, and then I put the top half back on. At this point, I kept things simple: I sliced & served with generous dollops of whipped cream.

It was a hit!

Wednesday, January 05, 2011

Solstice 2010

It's a little late in coming, I realize, but I thought I'd share with you the non-dessert components of my annual Solstice dinner. I went back to basics this year since I have been sick again and I wanted to keep it simple. This is essentially the same menu I made for my first Solstice dinner in 2008.

The menu:

Chicken Breast Stuffed with Herbed Goat's Cheese and Wrapped in Prosciutto
Caramelized Onion & Brie Bread Pudding (the perennial favourite!)
Brussels Sprouts Sauteed with Pancetta & Pecans
Salad by my SIL
And of course the coconut cake


Sunday, January 02, 2011

Magazine Monday # 72: Bobby Flay's Toasted Coconut Cake

On Dec. 21 I had my annual Solstice feast and for dessert I had a really hard time choosing what to make. There were so many great magazine recipes to choose from, but eventually I settled on this little number by Bobby Flay, which appeared in the holiday issue of Food Network Magazine.

There were a lot of steps to this cake, but it was overall quite simple despite the lengthy recipe. And I have to say it was quite possibly the most ridiculously amazing cake I've ever made. I'm not kidding - I've made a lot of great cakes, but this one took the...er cake. There were no leftovers at all.

I will definitely be keeping this in my repertoire, but I did one thing different: I didn't make a coconut simple syrup. The cake was so moist that I didn't feel it needed to be brushed with anything. I was also far more liberal with the Malibu I went to the liquor store specifically to purchase (I only go in there when looking for baking & cooking ingredients and I don't know my way around at all, so luckily the staff is quite helpful there even though I get funny looks from time to time). Also, the buttercream was way too buttery. I would probably use half a cup less the next time, and I had a lot leftover, too. The coconut custard was divine; there was some of that leftover too, which I just spooned from the bowl.

The recipe is here. I was so impressed with this recipe that with an Amazon gift card I got for Christmas courtesy my good friend Charlie, I ordered the new Bobby Flay's Throwdown cookbook. I'm very much looking forward to receiving it because I enjoy the show a lot.

Saturday, January 01, 2011

C's Caramel Corn

Oh, how I indulged this Christmas! On the afternoon of Christmas Eve we had my father's birthday celebration at my SIL's parents' place. You may recall my mentioning C once in a while; she's my SIL's mom and she and my SIL do some catering on the side that I help out with from time to time. C also put out a cookbook of some of her best known recipes, and the recipes of some of her friends and relatives. While over there on the 25th, and then again for Christmas dinner on the 25th, C had one of her huge stainless steel catering bowls on the table absolutely filled to the brim with homemade caramel corn. It was addictive. I ate way more of it than I'd like to admit to. She added peanuts and pecans to it, too, so it was more like poppycock.

The recipe appears in C's Tried and True cookbook, and is shared here on the blog with her permission.

Carmel Corn/Poppycock

1 1/2 cups brown sugar
3/4 cup white sugar
1/2 cup corn syrup
1/3 cup butter
3/4 cup cream
1 tsp vanilla
3 quarts popped popcorn

Method:

In a large pot, combine both sugars, corn syrup, butter, and cream. Cook over medium heat until the sugar has dissolved. Wipe down the edges of the pot to ensure no sugar granules are sticking to the sides. Don't stir once it boils. Boil until the soft/chewy ball stage. Cool slightly. Pour over popped corn. Add nuts if you wish. Mix well. Form into balls if desired.

For more information on the soft/chewy ball stage mentioned, here is a good article.

LinkWithin

Blog Widget by LinkWithin