Sunday, October 21, 2007

Old Fashioned Cinnamon Swirl Loaf

For some reason, I had a hankering for French Toast. I have no idea why. I knew I didn't want to make it from the Country Seed Bread (see post below) because seedy French Toast is no fun. So, I decided to make this recipe, which comes from my trusty Fleischmann's recipe book. I made it last night and used it for my French Toast this morning - it was awesome!

Now, I halved the recipe because I only wanted one loaf of this hanging around to tempt me, and it halves fine. I also didn't put the crumb topping on it because I didn't think it was necessary for French Toast purposes, but if you're just going to toast this for breakfast (or, as I also did, cut into it shortly after taking it from the oven and smearing it with butter) I would probably put the topping on. I also added the raisins to the dough rather than rolling them up in the middle with the filling. I won't do that again; the raisins on the top of the loaf burned, so next time I'll add them to the filling. Also, I discovered that you should probably put the loaf pan on a lined baking sheet (foil, parchment, or a silicone baking mat) because as the loaf rose during the baking process, the filling dribbled out and onto the floor of my oven, creating a bit of a mess.

Old Fashioned Cinnamon Swirl Loaf (makes 2 loaves)

5 to 5 1/2 cups bread or all purpose flour
1/3 cup sugar
2 packages (4 1/2 tsp) yeast
1 1/2 tsp salt
1 cup milk (had 10% kicking around from another project - it worked fine)
1/2 cup water
1/3 cup margarine or butter, cut into small pieces
2 eggs

Filling

3 tbsp melted butter
1/3 cup brown sugar
2 tsp cinnamon
1 cup raisins
1 egg white (or whole egg if you don't anticipate using the yolk for another purpose), lightly beaten
Crumb Topping (recipe follows)

OK - for the bread, see the bread baking tutorial.

To fill and shape the loaves, divide the dough in half. Roll each half into a 16x7" rectangle (keeping the other half covered while doing this so it doesn't dry out). Brush the rectangles with the melted butter to within an inch of the edges. Evenly sprinkle on the sugar, cinnamon, and raisins. Beginning at the short end of each rectangle, roll up tightly as you would a jelly roll; pinch seams tightly - both the middle seam and the end seams - to seal. Place, seam side down, in a well greased or parchment-lined loaf pan. Cover and let rise until doubled.

Brush the loaves with egg and sprinkle with Crumb Topping. Bake at 375F for 35 - 40 minutes until done. Remove from pans and let cool on wire racks.

Crumb Topping: In a small bowl, combine 1/3 cup all purpose flour, 1/3 cup firmly packed brown sugar, and 1 tsp cinnamon. Cut in 3 tbsp cold butter until the mixture resembles coarse crumbs.

Yummy, irresistible comfort food on a chilly morning - and it makes great French Toast, accompanied by maple syrup!

Country Seed Bread

You cannot beat Canadian Living for reliable recipes. I made this the other day and it's great!

Country Seed Bread

2 cups bread flour (or, all purpose will work, too)
1 cup whole wheat flour
1/4 cup flax seeds
2 tbsp sesame seeds
1 tbsp poppy seeds
2 tsp yeast
1 1/4 cups water (approx.)
2 tbsp liquid honey
2 tbsp veg oil (or melted butter)
1 1/2 tsp salt

Directions here, adding the seeds with the dry ingredients. I used an egg wash on the top to both provide shine and to adhere the additional sesame seeds to, solely for appearances' sake.

Sunday, September 23, 2007

Restaurant Review: Kas

Last night, my family and I had a great dining experience at a small restaurant in Nelson, BC, called Kas.

A small, cozy establishment, chef/owner Gordon Kleef, lets you know from the get go that this will be a unique dining experience. After being seated, Chef Gordon personally comes to your table and tells you that there is no menu. The meal he will prepare for you will be completely free-form and based on whatever is fresh on hand from that day. In our case, he mentioned he had rabbit, duck, lamb, and a few other things. He asks if there are any food allergies or foods you absolutely won't eat, and once he has that information, he retreats back into his kitchen and begins creating a one of a kind meal. Three courses, he says, and it's $30 per person.

It began with appies. The first plate brought out was a selection of different tomatoes grown in chef's neighbour's garden. They were sliced and topped with fresh onion slices, drizzled in a lovely olive oil and sprinkled with freshly ground pepper. For someone like me, who hates tomatoes, this wasn't something I was overly excited about, but I tried it - and liked it. Even my brother, who also hates tomatoes, liked it. Things were off to a good start. Fresh sourdough bread arrived, and there was a white balsalmic vinegar and olive oil combination for us to dip the bread into. The next arrival was very interesting: a grilled romaine caesar salad. The head of romaine was cut in half, grilled for a few moments, then smothered in a creamy dressing and sprinkled with cappicollo. I know what you're thinking: grilled lettuce? Very different, but very good, honestly. Next came two more appies: roasted garlic with chili jelly, baked brie, and croustadas. Chef also brought out a stew made with beef, pork, bacon, and mushrooms, served over rice. I think this was the weakest dish as it lacked depth of flavour and was on the bland side.

Then the fun really started. A huge platter of organic veggies came out: roasted potatoes, carrots, swiss chard, grilled zucchini, green and yellow beans, grilled then shredded turnip, and red cabbage with a bit of a vinaigrette.

The main course followed shortly afterwards: leg of lamb, roasted rabbit, duck confit with hoisin sauce, freshly caught lake trout stuffed with oysters and served in a lemon caper buerre blanc. My dad, who won't eat fish, got a supreme of chicken breast roasted with brie and smothered in a grape and grappa sauce. It wasn't his cup of tea, but it was definitely interesting.

Dessert was a trio of goodies: white chocolate cheesecake, toffee ganache torte, and a chocolate brownie cake.

Over all, this was a fantastic feast. I don't like lamb, and that was my least favourite thing on this menu. The trout was outstanding, as was the duck, and I also don't typically like duck. The food was prepared to perfection and the selection was amazing. The desserts were awesome, but too tiny! Since everything is served on large plates or platters, you serve yourself and pass everything around. I think we needed a larger serving of dessert because we essentially got one bite each of everything on the dessert plate.

But, for $30 a person, the value was excellent. We all went away full and satisfied and making plans to go back again soon.

Chef Gordon also prepared the food for the Nelson Rod & Gun Club annual game dinner this past spring (which you can read about here) and I was not impressed with the food there. But, in his own kitchen and obviously in his element there, he proved himself to be superb.

Kas is located at 602 Front Street in Nelson, BC. Reservations recommended (also call ahead to see what is on the menu for that evening): 250-505-5502 or 1-866-592-2233. Be prepared to be there for a while. We were there over two and a half hours, but they have excellent wine to drink while you wait for your food!

Saturday, September 08, 2007

Bagels & Giant Soft Pretzels

Finally, after a sweltering, dry summer, it has cooled off and I think I can say with confidence that Autumn is come at last. It's a great time of year for baking since there is an abundance of fabulous produce available: apples of all kinds, pears, berries, and soon, my favourite, pumpkin. But right now, I'm just glad it's cool enough to do some good old fashioned yeasty baking. Today, in a rare fit of energy, I decided to make a couple of things because they involved similar processes. I made Soft Pretzels from a recipe in the latest Canadian Living edition. I also made the bagel recipe from Rose Levy Beranbaum's The Bread Bible. I must have wanted to do this badly because I spent $9 on organic barley malt syrup at my local overpriced grocery store.

Both recipes involved boiling each item in a sweet water bath. I began with the pretzel recipe, since the bagels required a sponge and an extra rise after dough development (though I skipped the 24 hours in the fridge part because I didn't want to make this into a two-day affair). I boiled the pretzels in a bath with baking soda and honey, and when it came time to boil the bagels, I just added a touch more baking soda and a bit of molasses to sweeten the water back up. Baking soda helps in the browning process.

Soft Pretzels, adapted from Canadian Living

1 tsp granulated sugar
1 1/2 cups warm water
1 pkg. dry yeast ( 2 1/4 tsp)
3 - 4 cups bread flour
1 tsp salt
baking soda

Topping

1 egg, beaten (optional)
2 tsp coarse salt

1. Combine sugar, salt yeast, and 3 cups of flour. Add water to make a sticky dough. Turn out onto floured surface and knead for 10 minutes or until smooth and elastic, adding more flour if necessary. I used my Kitchen Aid and developed the dough on speed 2 for about 6 - 8 minutes.

2. Place in a well-greased bowl, turning to grease all over, and cover with plastic wrap or a wet tea towel. Let rise until doubled in bulk.

3. Punch down the dough. Cut into 8 pieces. On a lightly floured surface, roll each piece into a 20" rope. Form into a circle, crossing the ends left over right above the circle 3" from the end. Pick ends up and cross left end over right again. Bring ends over and under to bottom of circle, overlapping by 1/4" to create a pretzel shape; press to seal. (This is where I had trouble. My pretzel-shaping was really off, and they wound up looking more like my knot buns instead. Oh well. We live and learn.) Place on parchment-lined baking pans. Cover and let rise for 15 minutes.

4. Add 2 tbsp baking soda to large, wide saucepan of boiling water. (I added 2 tbsp of honey, but this is optional.) Boil pretzels, 3 at a time, turning over once with slotted spoon, until puffed up and set - about 1 - 2 minutes. Transfer back to baking sheets and let cool slightly.

5. Brush with egg wash, if using. Sprinkle with coarse salt. Bake at 400F fro 25 - 30 minutes, rotating if necessary, until golden brown and bottoms sound hollow when tapped. Transfer to racks and cool.

Bagels, adapted from The Bread Bible

Sponge:

1 tsp instant yeast
2 1/4 cup warm water
3 cups bread flour
(if using barley malt syrup as opposed to the malt powder in the ingredients list to follow shortly, add 1tbsp of it to the water in this step)

In a mixing bowl, or the bowl of your stand mixer (should you be fortunate enough to have one, but be aware that this is a large recipe and the regular 4 1/4 quart or 5 quart Kitchen Aid bowl will probably not be big enough; also, the small watt models like the 325 and 350 watt ones require extra caution because this is a really dense dough and you don't want to burn out your motor; making this by hand may be safer), whisk these ingredients together to form a thick, batter-like mixture. Scrape down the sides. Cover with plastic wrap.

Flour mixture:

3 tbsp unsalted butter - optional (I didn't bother)
2 1/3 cups bread flour
1 tsp instant yeast
1 tbsp malt powder (if you're not using the syrup)
1 tbsp sugar
1 tbsp salt
1 tsp black pepper (I didn't bother with this either...couldn't see the point, really)

Combine these ingredients well and gently put it on top of the sponge mixture.

Cover the whole thing up again and let it sit for a minimum of an hour or up to 4 hours. You can also refrigerate it overnight for up to 24 hours. The sponge will bubble through the flour mixture - this is fine.

Stir the flour mixture into the sponge until it becomes too stiff to mix. Hand-knead the dough in the bowl until it comes together. If using a stand mixer, stir on speed 1 with the dough hook until the mixture comes together.

Knead until smooth and elastic, or develop on speed 2. Now, I have the 525 watt Kitchen Aid with the 6 quart bowl and I only developed this on speed two for a few minutes, because I could feel the machine heating up. At this point, I removed the dough to a lightly floured surface and hand-kneaded it until it was properly developed. Let the dough rest for about 20 minutes.

Let the dough rise in a greased bowl, covered, until doubled in bulk - about 1 to 2 hours. The original recipe now instructs you to deflate the dough and put it back in the greased bowl and put the whole thing in the fridge for a minimum of 4 hours, or overnight, or even 2 days. This allows for flavour development. I skipped this part, as I mentioned above.

Shape the bagels. To do this, divide the dough into 10 equal portions. As you work with one piece, keep the rest covered so they don't dry out. Roll the portion into 12" long ropes and seal the ends together tightly with a bit of overlap. Or, roll the portion into a ball and poke a hole in it with your index finger, gradually hooking the bagel over your thumb and index finger on your other hand, until the hole is about 2 1/2 inches in diameter.

Preheat the oven. The original recipe says 500F; my oven won't do that (it's old), so I settled on 450F. If you want to use a baking stone, chuck it in now.

Boil the bagels. Remember that nice water we used for the pretzels? Reuse it. Or, bring a large dutch oven full of water to boil and put in some baking soda (1 tsp) and some molasses (2 tbsp). Gently transfer the bagels into the pot, boiling three at a time. They need room to puff up. Boil for 1 - 2 minutes, turning over once with slotted spoon or spatula.

If you want, you can put an egg wash on them after they come out of the bath. Just beat an egg up and brush it on the bagels. Sprinkle on some poppy or sesame seeds, or some herbs, or whatever. If you don't want the egg wash, the seeds will still adhere to the surface.

Bake the bagels for 15 - 20 minutes, or until golden brown and hollow-sounding when tapped on the bottom. Remove to wire racks and cool. Enjoy!

This sounds like a lot of work, I know. But it's done in quite gradual stages, so it's manageable. And the results are fantastic and so worth it.

Tuesday, July 31, 2007

Too Hot in the Kitchen!

Man, the weather is a killer here. Way to hot to even think about baking anything. But I am dying to bake...I haven't baked in nearly a month and I miss it a lot.

If you're dying for something to read, my regular blog is here, and I'm also now a contributor over at Mr. Anchovy's, with my inaugural post being all about the weather in these parts and the forest fire risks we're coping with these days.

Hopefully, I'll see you at one of these places, and hopefully, hopefully I'll be back to posting here soon.

Sunday, July 08, 2007

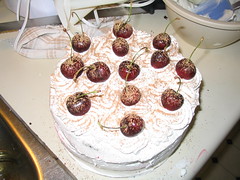
Black Forest Cake


Jem's Birthday Cake
Originally uploaded by wanderingcoyote.
I made this on the weekend for my brother's birthday. It was fantastic! I love cherry season.

Full story here.

Tuesday, June 05, 2007

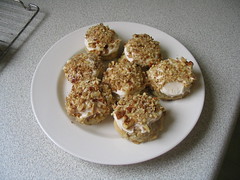
Maple Pecan Cookies


Maple Pecan Cookies
Originally uploaded by wanderingcoyote.
I made these this afternoon and they are absolutely fan-frickin'-tastic! The dough was a little crumbly and took some extra maple syrup to make it come together, but the cookies turned out buttery and tender and not too sweet. Of course, cream cheese icing is always a plus, too. I got the recipe from a book I got last December called The Cookie Bible. I've made several recipes from it and they always turn out great.

Quebec Maple Pecan Drops

Cookies:

1/2 cup butter, softened
1/2 cup granulated sugar
3 tbsp (or a little more, depending on the texture of your dough) maple syrup
1 cup flour
1/2 tsp baking soda
1/4 tsp salt
1 cup quick oats
1/2 cup coarsely chopped pecans, toasted
1/4 cup packaged chopped pitted dates (I didn't have any so I just omitted them)

Frosting (optional, but recommended!)

2 oz cream cheese, softened
2 tbsp butter, softened
2 tbsp maple syrup
1 1/2 cups icing sugar
1/3 cup finely chopped pecans, toasted

1. Preheat oven to 350F. Beat butter and sugar until creamy, then add syrup. Combine dry ingredients and beat into the butter mixture. Add oats, nuts, and dates until combined.

2. Drop by tablespoonful 2 inches apart on parchment-lined cookie sheets. Bake 10 - 12 minutes, or until golden brown. Let stand on cookie sheets for 2 minutes before transferring to wire racks to cool.

3. For the cream cheese frosting, beat the cheese and butter with an electric mixer until smooth. Add the syrup. Gradually beat in the sugar until smooth. Spread frosting over cold cookies and top with the finely chopped pecans.

Enjoy!

Sunday, May 13, 2007

Cold Risen Buns

I just took these out of the oven. It's the same recipe I used yesterday, only I decided to make buns out of it. I egg washed them and added some sesame seeds. I'm taking these to dinner at my dad's tonight, and although he doesn't like white bread or white flour in anything, I think he'll be OK with these (if he isn't, he's nuts!). Again, I rose these in the fridge for a few hours, and like the bread I made yesterday, they rose even higher during the baking process.

Damn I'm good!

Saturday, May 12, 2007

The Cold Rise

It's been a while, I know. I haven't been baking or cooking much lately - it's a long story. I have moved house, and hopefully I'll be able to bake more now that I'm not contending with people on diets.

I made this today. It's just your basic white bread, but after reading The Underground Baker's latest post where she mentioned that she put her bread dough in the fridge for a generous amount of time to develop the sugars, I decided to try a different technique. I rose this in the fridge. Yeast will rise in the fridge, but it will take much longer. I shaped this loaf and put it in the pan, covered it with plastic wrap, and put it in the fridge for three and a half hours. By that time it had doubled in size, and the dough was sturdy and scored very easily. Oftentimes, I find, that warm-risen loaves I've made at home have deflated quite a bit upon scoring or been too gooey to score well.

I'm getting used to a new oven here in my new home. It's a cooler oven, i.e. 350F on the dial is probably more like 300F. I cranked the heat up and put the loaf in. 16 minutes later, I had this. It rose quite a bit more during the baking process and came out quite gorgeously coloured.

It's a funky shape, I know, but I am very pleased with this. It looks very artisanal and was nice and crusty on the outside and soft on the inside. And it tasted great.

Sunday, March 25, 2007

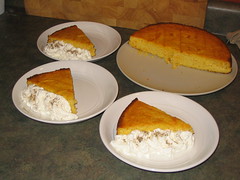
Whole Orange and Almond Cake

I think it's a good idea to have at least one wheat/gluten free dessert in your repertoire. There are, after all, a lot of people out there who cannot have wheat but who still have sweet tooths worthy of satisfaction. This is a really cool recipe I made a couple of weeks ago, also from The Essentail Baking Cookbook, hence the weights as opposed to volume as it's an Australian publication (so you'll need a scale). It's a very different recipe, but it makes a wonderful, almost pudding-like cake that you can dress up in any number of ways.

Whole Orange and Almond Cake

2 large oranges
5 eggs
220g/7oz white sugar
250g/8oz ground almonds (almond meal)
1 tsp baking powder
icing sugar, to dust

1. Lightly grease a 9" springform pan with butter and line the bottom with either wax paper or parchment.

2. Scrub the oranges under warm water to remove any waxy coating or stamps. Place in a saucepan and cover them with water. Boil for an hour. Remove and set aside to cool.

3. Preheat the oven to 350F. Using a plate to catch any juice, quarter the oranges and discard only the seeds. In a food processor or blender, puree the oranges to a pulp

4. Beat the eggs in a large mixing bowl with an electric mixer until light and fluffy. Add the orange pulp and juices, ground almonds, sugar, and baking powder and mix thoroughly. Pour into the springform pan and bake for about an hour, or until the cake is firm to the touch and lightly golden. Bake it longer if it's wet. Cool in the pan for a few minutes before tipping out onto a cooling rack.

Dust with icing sugar. Serve with whipped cream and a sprinkle of cardamom.

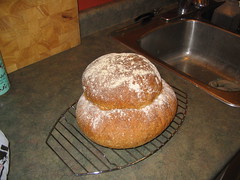
Cottage Loaf


Cottage Loaf
Originally uploaded by wanderingcoyote.
This also came from The Essential Baking Cookbook. It's kind of a cool shape, but you can pretty much bake it in any shape you want to, though, again, this recipe is a little large for a regular loaf pan. This would also make really good buns.

Cottage Loaf

7g/1/4oz/1 heaping tbsp yeast
1 tbsp soft brown sugar
2 cups white bread flour
2 cups whole wheat flour
1 tsp salt
1 1/2 - 2 cups warm water

See bread baking tutorial for instructions, but again, let this rise twice: once in the bowl and once after shaping.

To shape this loaf, pull away 1/3 of the dough from the rest and shape each portion into balls. Place the larger on a lined baking sheet and brush the top with water. Place the smaller on top of it, pushing down with two fingers. Rise again.

Bake at 375F until done - 30-40 minutes.

Ciabatta with Cheddar


Ciabatta with Cheddar
Originally uploaded by wanderingcoyote.

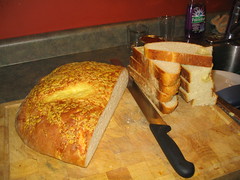
This is a really tasty bread that came from a new cookbook I got around Christmas time called The Essential Baking Cookbook. It's an Australian publication so the recipes in it oftentimes contain weights as opposed to volume, necessitating a scale. This recipe makes a fairly large loaf that would be too big for your regular bread pans, so a freeform loaf works best here. I added to the top about a cup and a half of grated old cheddar cheese.

Ciabatta with Cheddar

7g/1/4oz/1 heaping tbsp yeast.
1 tsp sugar
2 tsp salt
3 cups/750g/1.5lbs bread flour

1 - 1 1/2 cups warm water
50mL olive oil
extra flour, to sprinkle
1.5 cups aged white cheddar, grated

See the bread baking tutorial for instructions on how to make the dough, however, let the dough rise twice: once in the bowl and once after shaping.

After the first rise, gently tip the dough from the bowl onto a parchment-lined baking sheet. Gently spread it into an oval shape about 12"x4.5". Let it rise another half hour. Sprinkle it with the cheese and bake at 400F until done and cheese is golden brown (about half an hour, give or take).

Enjoy!

Saturday, December 23, 2006

Merry Christmas


Christmas Baking 2006
Originally uploaded by wanderingcoyote.

I know I've been away a long time, but I want to wish all my ReTorte readers a very happy Christmas and a yummy new year. Here are some treats I made this year for your viewing pleasure.

Be safe everyone!

Sunday, November 12, 2006

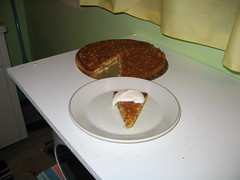
Macadamia Coconut Tart


Macadamia Coconut Tart
Originally uploaded by wanderingcoyote.

Pardon the bad photograph!

As I mentioned in the previous post, I get a few foodie magazines. This recipe came from Gourmet, the most recent additon to my subscription collection. The other day, my sister-in-law said, "Do you ever use the recipes in these magazines?" I had to admit that I rarely did, and resolved there and then to start making some.

This tart is really decadent and sophisitcated. I took it last night to a dinner party at my younger brother's place, and it was a huge hit.

One caveat: the shell shrunk considerably during the baking process and I had to take out some of the filling right before putting it in the oven. I wound up with four mini-tarts made in muffin tins with the leftover pastry dough and filling. So be careful when filling the tart; you don't want it overfilled or you'll get a real mess. Bake it on a baking sheet, too, in case of overflow.

Macadamia Coconut Tart

For the crust:
1 1/4 cups all purpose flour
2 tbsp sugar
1/2 cup cold unsalted butter, cut into small cubes
1/4 tsp salt
3 - 5 tbsp ice water

NOTE: the original recipe calls for 6 tbsp butter and 2 tbsp vegetable shortening. I used the above ingredients and it was fine - though I did have that shrinkage...

OK, this is really simple - if you have a food processor. Just pulse all the ingredients until you get a coarse meal-like consistency. Tablespoon by tablespoon, add the water until the mixture just comes together when pressed with your fingers. Remove from the processor bowl, knead once with the heal of your hand to distribute the fat evenly, then press into a 5" disc. Wrap with plasic wrap and refrigerate until chilled - about half an hour.

Alternately, if you don't have a food processor, whisk together the dry ingredients and cut the butter in with a pastry cutter unitl coarse meal is formed. Add water, a tbsp at a time, mixing with a fork, until it just comes together when pressed with your fingers. Continue as above.

Now you need to do something called "blind baking". This means you're going to bake the tart shell without its filling. So, roll out your dough to a 13" round. Gently place the dough in a 10" tart shell with removable bottom (these are cheap at any kitchen shop). Fit into the tart pan and prick the bottom all over with a fork (I neglected to do this - big mistake, trust me!). Chill until firm - again about 30 minutes (or stick it in the freezer to speed things up). Now place a sheet of foil over the tart shell and fill this with pie weights (I used raw rice; you can also use raw beans). Bake at 375F until sides are pale golden and firm. Remove the foil and pie weights. Continue to bake until deep golden brown. Leave oven on.

NOTE: I used an 11" tart pan and it shrunk about an inch in diameter and half an inch in depth, and like I said above, the filling didn't fit in when the time came. So just be wary of this because it may happen to you, too.

For the tart filling:
3 large eggs
1 1/4 cups packed light brown sugar
1 tsp vanilla
1/4 tsp salt
1/4 cup butter, melted and slightly cooled
1 1/2 cups dry roased, roughly chopped macadamia nuts
1 cup flaked coconut (the recipe calls for sweetened; I used unsweetened and it was fine)

Whisk together the brown sugar and eggs. Add vanilla and salt until combined. Whisk in melted butter, nuts and coconut. Pour into tart shell and bake until set in centre - about 25 - 30 minutes. Cool on rack to room temperature. Serve with sweetened whipped cream.

Let me know how it goes!

Tuesday, November 07, 2006

Chicken & Rice Dinner


Chicken & Rice Dinner
Originally uploaded by wanderingcoyote.

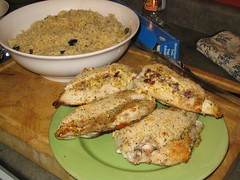
I'm coooking dinner for the family at least once a week. Lately, I've had a hankering for cranberries and orange, for some strange reason. It's a fabulous flavour combination, and mixed with the saltiness of feta, this made for a tasty accompaniment to chicken. The rice is very simple, too, and the orange zest in it complimented the orange in the chicken. I served this meal with green beans (the only veg we can all agree on between us) and spaghetti squash for the two of us who eat it. Also, a nice green salad.

Chicken Stuffed with Feta Cheese, Cranberries, and Orange

4 bone-in chicken breasts, skin removed (you can use boneless, skinless, but they tend to be too small to adequately stuff, and the bone provides struture in this case, as well as keeping the meat juicy during cooking)
zest of one orange
freshly squeeze juice of half an orange
3 tbsp dried cranberries
1/3 cup feta cheese
1/3 cup fine bread crumbs
2 tbsp freshly grated parmesan (if you have the not-so-fresh kind, it'll be OK)
1/2 tsp dried basil

1. In a food processor fitted with blade, pulse together the feta, cranberries, zest and orange juice until a crumbly mixture forms, that sticks together when pressed with your fingers. Alternately, if you don't have a food processor, you can mash these ingredients together with a fork, but it'll be more crumbly.

2. In the thicker end of the chicken breast, slice a long slice lengthwise from one side to the other, creating a pocket. Divide stuffing in 4, and stuff each breast, gently pressing down the top so there isn't a gaping hole.

3. Combine the breadcrumbs, parmesan, and basil and put on a plate. Press crumb mixture onto chicken breasts and place the chicken breasts on a greased tray (I line with it foil and oil the foil...easy clean-up that way). Sprinkle the breasts with remaining crumb mixture.

4. Bake at 350F until done; about 35 - 40 minutes.

Basmati Rice with Orange and Olives

1 1/2 cups white basmati rice
2 1/2 cups chicken stock (I use Bovril packets)
1/2 cup freshly squeezed orange juice
zest of one orange
1/2 cup kalamata olives, pitted and roughly chopped

1. Combine all ingredients in a saucepan and bring to boil. Once it's boiled, turn the heat to low and let this sit - undisturbed - for 20 or so minutes. Stir. And voila.

Even serving this with just a simple salad would be perfect. Enjoy!

LinkWithin

Blog Widget by LinkWithin