
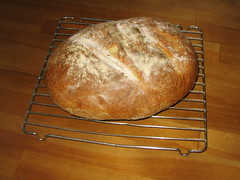
Basic Hearth Loaf
Originally uploaded by wanderingcoyote.
A couple of years ago, before I left Crapters and went off to culinary school, I purchased Rose Levy Beranbaum's The Bread Bible. I am ashamed to say, that until very recently, I've never made a single recipe from it, though I did refer to it quite a bit in school because it contains a lot of very valuable information on breadbaking.
The recipes are far more sophisitcated that what's generally found in my trusty Fleischmann's recipe book, and most of the breads involve a starter of some sort, or a sponge or predough. For this reason, I've avoided using this cookbook because sponges, predoughs, starters of various kinds always struck me as far too finicky and time consuming. Though the recipes are well-written and very easy to follow, each bread recipe involves several pages, and for some reason, this didn't seem worth it to me. I just want to get baking a loaf of bread, crying out loud!
What a fool I was. This basic loaf is absolutely the most fantastic homemade bread I've ever encountered - in terms of both flavour and texture, and interestingly enough, longevity. It's worth the extra time and effort, and there's no going back.
Basic Hearth Loaf
Step One
for the sponge:
1 cup bread flour
1/4 cup whole wheat flour or kamut flour
3/8 tsp quick or instant yeast
1 1/4 tsp honey
about 1 1/3 cups water, at room temperature (70-90F)
In a mixer bowl or other large bowl, combine these ingredients and whisk them for a couple of minutes to incorporate some air. It will be the consistency of a thick batter. Scrape down the sides of the bowl, cover with plastic wrap.
Step Two
Flour mixture
1 3/4 cups + 2tbsp bread flour
1/2 tsp quick or instant yeast
1 1/2 tsp salt
Combine these ingredients (the original recipe says to omit the salt until the kneading stage, but I haven't done this and it still works out) and gently scoop them over the sponge mixture, covering the sponge mixture completely. Cover with plastic wrap, and allow it to ferment for 1 - 4 hours at room temperature. The sponge will eventually bubble up through the flour and this is fine.
Step Three
Mix the dough. This is where the original recipe says to add the salt, so if you're doing that way, this is the time. I use my Kitchen Aid mixer for this because the dough is sticky. You're looking to mix all the ingredients well and form a homogenous ball of dough. Again, here I depart again from the original recipe and start the kneading process here, whearas Beranbaum instructs you to let it rest for 20 minutes, then knead it. I don't know why, but I've had no problems doing it my way.
Step Four
Knead the dough. I do this on speed 4 of my mixer for about 5 - 8 minutes, depending. You can do it by hand, too. The dough should be very elastic and slightly sticky to the touch. If it's sticking to the bottom of the mixer bowl and gooey still, add more bread flour, a tablespoon at a time. If it's too dry, add water a few drops at a time.
Step Five
Allow the dough to rise. Place it in a bowl that has been greased or sprayed with cooking spray. Grease the top of the loaf and cover it with plastic wrap. Proof it till it's doubled in volume - anywhere between 45 minutes to an hour and a half, depending.
Step Six
Shape the dough, and let it rise again. Once more, you're looking for double the volume. Preheat the oven at this time to 450F.
Step Seven
Score and bake. I use a small serrated knife to score this but you can also use razor blades or any other sharp knife. I sprinkled some flour on top, and I baked this on a baking sheet lined with parchement that had some cormeal spread on it. Immediately after putting the bread in the oven, turn the heat down to 425F. The baking process should take about 25-30 minutes; be sure to turn the bread once for even browning. Beranbaum advises you to bake the bread with some ice cubes sizzling away in a pan beneath the loaf; you can do this but I find putting a pan underneath my bread blocks the heat and it tends not to brown on the bottom. If you have a spray bottle that has a fine mist, you can spray the bread as you put it in the oven; the steam created produces crunch, shine, and helps with colour.
Step Eight
Remove from the oven and cool. Transfer to a wire rack immediately.
So, this process took me about 3.5 - 4 hours total. A lot depends on what your room temperature is like, the humidity in the air and other factors, but most of the steps involve just leaving it for a time, so you can go and do other things. Trust me, if you can pull this loaf off, people will adore you and compliment you by saying your loaf looks like it's been purchased at an artisan bakery.
Questions? Comments? You know what to do.
7 comments:
Okay. So now I don't feel so bad. I own the same book and I don't even think I've cracked the spine on it!
Your bread is just gorgeous. You have the breadmaker's gene I can tell.
I encourage you to just pick it up and read it because it is full of very good information, and if you want to make a recipe, they're very clearly laid out and well written.
I do have some breadbaking genes; my mom used to make all kinds of breads for us, and it was just awesome! She taught me the basics before I went off to culinary school.
I've used the basic hearth bread recipe for a year now. It's fabulous!
I even add a bit to it. I put the sponge in the refrigerator overnight after the first four hours. Then, I do the mixing and kneading, returning it to the refrigerator overnight.
The bread on made on the third day (sounds biblical, doesn't it?) is amazingly good. Has a faint taste of sourdough, in my opinion.
In your description of Step Two, I think you made an error. The original recipe says to omit the salt not the flour. I accidentally added the salt to my sponge this weekend and it worked out fine too.
gnuf: I'm looking at the original recipe in the book right now and it's a little contradictory, actually. In step two it says "combine the ingredients for the flour mixture and add to the sponge." It doesn't specify anything re. the salt here, but it does in step three. So it's a little confusing. I just thought that since salt inhibits yeast growth, it made more sense to add it after the sponge had finished fermenting. Thanks for the comment!
I suppose the part in bold is a bit confusing, but if you read the rest of the text, it does say to mix only the flour and yeast together.
Incidentally, I was just making the sponge for the Velvety Buckwheat Bread variation and came across the errata list for the book here.
I'm glad I found this before trying to knead the dough tomorrow morning. I was able to scoop out the flour mixture and mix some water into the sponge.
Oh, thanks so much for the link. I just ordered Rose's Cake Bible from Amazon. Can't wait!
Post a Comment