Saturday, December 23, 2006

Merry Christmas


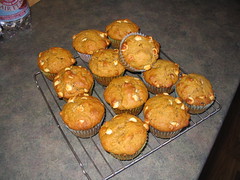
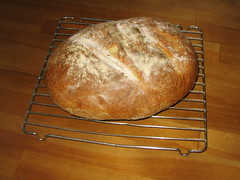
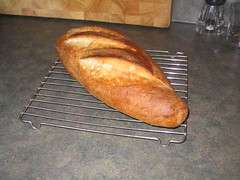
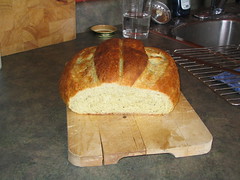
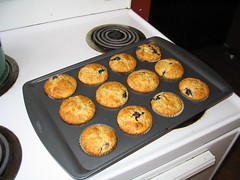
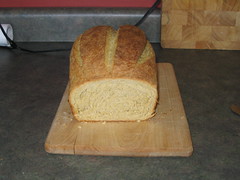
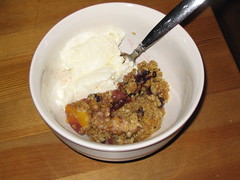
Christmas Baking 2006
Originally uploaded by wanderingcoyote.

I know I've been away a long time, but I want to wish all my ReTorte readers a very happy Christmas and a yummy new year. Here are some treats I made this year for your viewing pleasure.

Be safe everyone!

Sunday, November 12, 2006

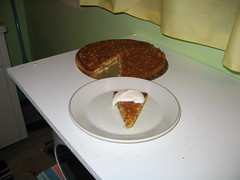
Macadamia Coconut Tart


Macadamia Coconut Tart
Originally uploaded by wanderingcoyote.

Pardon the bad photograph!

As I mentioned in the previous post, I get a few foodie magazines. This recipe came from Gourmet, the most recent additon to my subscription collection. The other day, my sister-in-law said, "Do you ever use the recipes in these magazines?" I had to admit that I rarely did, and resolved there and then to start making some.

This tart is really decadent and sophisitcated. I took it last night to a dinner party at my younger brother's place, and it was a huge hit.

One caveat: the shell shrunk considerably during the baking process and I had to take out some of the filling right before putting it in the oven. I wound up with four mini-tarts made in muffin tins with the leftover pastry dough and filling. So be careful when filling the tart; you don't want it overfilled or you'll get a real mess. Bake it on a baking sheet, too, in case of overflow.

Macadamia Coconut Tart

For the crust:
1 1/4 cups all purpose flour
2 tbsp sugar
1/2 cup cold unsalted butter, cut into small cubes
1/4 tsp salt
3 - 5 tbsp ice water

NOTE: the original recipe calls for 6 tbsp butter and 2 tbsp vegetable shortening. I used the above ingredients and it was fine - though I did have that shrinkage...

OK, this is really simple - if you have a food processor. Just pulse all the ingredients until you get a coarse meal-like consistency. Tablespoon by tablespoon, add the water until the mixture just comes together when pressed with your fingers. Remove from the processor bowl, knead once with the heal of your hand to distribute the fat evenly, then press into a 5" disc. Wrap with plasic wrap and refrigerate until chilled - about half an hour.

Alternately, if you don't have a food processor, whisk together the dry ingredients and cut the butter in with a pastry cutter unitl coarse meal is formed. Add water, a tbsp at a time, mixing with a fork, until it just comes together when pressed with your fingers. Continue as above.

Now you need to do something called "blind baking". This means you're going to bake the tart shell without its filling. So, roll out your dough to a 13" round. Gently place the dough in a 10" tart shell with removable bottom (these are cheap at any kitchen shop). Fit into the tart pan and prick the bottom all over with a fork (I neglected to do this - big mistake, trust me!). Chill until firm - again about 30 minutes (or stick it in the freezer to speed things up). Now place a sheet of foil over the tart shell and fill this with pie weights (I used raw rice; you can also use raw beans). Bake at 375F until sides are pale golden and firm. Remove the foil and pie weights. Continue to bake until deep golden brown. Leave oven on.

NOTE: I used an 11" tart pan and it shrunk about an inch in diameter and half an inch in depth, and like I said above, the filling didn't fit in when the time came. So just be wary of this because it may happen to you, too.

For the tart filling:
3 large eggs
1 1/4 cups packed light brown sugar
1 tsp vanilla
1/4 tsp salt
1/4 cup butter, melted and slightly cooled
1 1/2 cups dry roased, roughly chopped macadamia nuts
1 cup flaked coconut (the recipe calls for sweetened; I used unsweetened and it was fine)

Whisk together the brown sugar and eggs. Add vanilla and salt until combined. Whisk in melted butter, nuts and coconut. Pour into tart shell and bake until set in centre - about 25 - 30 minutes. Cool on rack to room temperature. Serve with sweetened whipped cream.

Let me know how it goes!

Tuesday, November 07, 2006

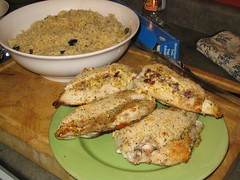
Chicken & Rice Dinner


Chicken & Rice Dinner
Originally uploaded by wanderingcoyote.

I'm coooking dinner for the family at least once a week. Lately, I've had a hankering for cranberries and orange, for some strange reason. It's a fabulous flavour combination, and mixed with the saltiness of feta, this made for a tasty accompaniment to chicken. The rice is very simple, too, and the orange zest in it complimented the orange in the chicken. I served this meal with green beans (the only veg we can all agree on between us) and spaghetti squash for the two of us who eat it. Also, a nice green salad.

Chicken Stuffed with Feta Cheese, Cranberries, and Orange

4 bone-in chicken breasts, skin removed (you can use boneless, skinless, but they tend to be too small to adequately stuff, and the bone provides struture in this case, as well as keeping the meat juicy during cooking)
zest of one orange
freshly squeeze juice of half an orange
3 tbsp dried cranberries
1/3 cup feta cheese
1/3 cup fine bread crumbs
2 tbsp freshly grated parmesan (if you have the not-so-fresh kind, it'll be OK)
1/2 tsp dried basil

1. In a food processor fitted with blade, pulse together the feta, cranberries, zest and orange juice until a crumbly mixture forms, that sticks together when pressed with your fingers. Alternately, if you don't have a food processor, you can mash these ingredients together with a fork, but it'll be more crumbly.

2. In the thicker end of the chicken breast, slice a long slice lengthwise from one side to the other, creating a pocket. Divide stuffing in 4, and stuff each breast, gently pressing down the top so there isn't a gaping hole.

3. Combine the breadcrumbs, parmesan, and basil and put on a plate. Press crumb mixture onto chicken breasts and place the chicken breasts on a greased tray (I line with it foil and oil the foil...easy clean-up that way). Sprinkle the breasts with remaining crumb mixture.

4. Bake at 350F until done; about 35 - 40 minutes.

Basmati Rice with Orange and Olives

1 1/2 cups white basmati rice
2 1/2 cups chicken stock (I use Bovril packets)
1/2 cup freshly squeezed orange juice
zest of one orange
1/2 cup kalamata olives, pitted and roughly chopped

1. Combine all ingredients in a saucepan and bring to boil. Once it's boiled, turn the heat to low and let this sit - undisturbed - for 20 or so minutes. Stir. And voila.

Even serving this with just a simple salad would be perfect. Enjoy!

Saturday, November 04, 2006

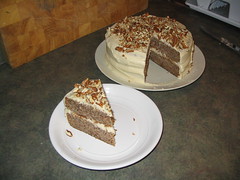
Maple-Pecan Layer Cake

Maple-Pecan Layer Cake

I have a membership in the Cooking Club of America. I was lured by a screaming deal on the fee and the fact that part of the membership included a subscription to the club's magazine, Cooking Pleasures. I like the magazine a lot; the recipes are good and there's always decent information in them. However, I have three other subsciptions - Canadian Living, Bon Appetit, and Gourmet, and of all four, Cooking Pleasures is the least bang for my buck. It's bi-monthly and just as much money as the others. So, when my membership is up in March, I'm going to let it lapse.

This recipe came from the most recent issue of Cooking Pleasures (I adapted the instructions somewhat). There was a whole section on pecans and the nuts happened to be on sale last week at Save-On Foods. It's a grea cake, and dense enough to be used for such things as tiered cakes, where the cake needs to be heavier to provide structure. I only have 8" cake pans, but this still worked well, even though the recipe calls for 9" pans.

Maple-Pecan Layer Cake

Cake:
2/3 cup unsalted butter, softened
1 1/3 cups sugar
4 eggs
1 1/2 tsp vanilla extract
1 cup all purpose flour
1/2 tsp salt
1/2 tsp baking soda
1/4 tsp baking powder
1 cup finely grated or ground pecans, toasted (I had whole pecans that I pulsed in the food processor and toasted them gently in a frying pan over medium heat)
2/3 cup sour cream (I used plain yogurt, which worked)

Icing:
3 cups powdered sugar, sifted
1/2 cup softened unsalted butter
1/2 cup maple syrup
1/4 cup finely chopped toasted pecans

1. Preheat oven to 350F. Butter and flour two 9" round cake pans and line with parchment paper.

2. In a large bowl, beat the butter and sugar until light and creamy - 4 minutes or so. Add eggs one by one, then vanilla. Beat until well combined. Add the pecans and sour cream and stir until combined.

3. In a medium bowl, whisk together the dry ingredients. Fold gently into the butter/egg mixture and then divide the batter evenly between the pans.

4. Bake for 30 minutes or until golden brown and a tester inserted in the centre comes out clean. Cool on a wire rack until room temperature.

For the icing:

Beat the butter until fluffy and sift in the icing sugar. Add the maple syrup and beat until smooth and well-combined. Ice the cake and top with the chopped pecans. Serve and enjoy.

Let me know what you think.

Saturday, October 14, 2006

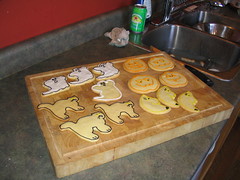
Halloween Cookies


Halloween Cookies
Originally uploaded by wanderingcoyote.

I made these just now and they turned out pretty nicely, if I do say so myself.

Sugar Cookies

1 cup butter
1 cup sugar
2 eggs
1/4 tsp salt
1 tsp baking soda
1 tsp cream of tartar
2 1/2 cups all purpose flour

1. Cream together the butter and sugar until fluffy. Add eggs one at a time. Add salt, cream of tartar, and baking soda.

2. Add the flour and mix until the dough just comes together. Turn it out onto a well floured surface and knead once or twice just to bring all the ingredients together into a ball.

3. Again, flour your surface, and a rolling pin. Roll the dough out to 1/2cm thickness, and cut with cookie cutters. Place a in inch apart on parchment-lined baking sheet. Bake at 375F for 10 - 12 minutes, or until barely golden around the sides. Remove to wire racks to cool. Decorate.

Royal Icing

2 egg whites
approx. 2 cups icing sugar - more or less depending on size of whites and desired thickness of icing

In a bowl, whisk egg whites just a couple of times to relax them. Add the sugar gradually, whisking until smooth and blended (I didn't make this particular royal icing in the mixer because I didn't want to incorporate any air) and you get your desired consistency. You don't want it too stiff, but not too runny, either. Just a little thicker than runny honey - or else it'll be a pain to pipe your decorations. Divide and colour.

I used a parchment piping bag for these, but you can use a small piping bag fitted with a #1 or #2 tip.

Have fun!

Thursday, September 28, 2006

Meme

Peabody tagged me for this. Thanks!

I am thinking about: what I'm going to have for dinner
I said: "I'll have a scoop of cookies n cream in a waffle cone" early this afternoon
I want to: make fancy cookies with my cool new leaf cookie cutters
I wish: I had more get up and go these days
I regret: working at that dreadful bakery this past spring
I hear: my sister-in-law decluttering the house
I am: feeling kinda cranky these days
I dance: never; I've always hated dancing
I sing: along frequently to whatever I'm listening too
I cry: more than I admit
I am not: patient
I am: a great bread-baker!
I write: frequently
I confuse: myself (sometimes)
I need: to practice piping techniques

I tag: tshsmom and Nancy Drew

Sunday, September 17, 2006

Pumpkin White Chocolate Chip Muffins


Pumpkin White Chocolate Chip Muffins
Originally uploaded by wanderingcoyote.

I got this recipe from Peabody. It's absolutely fabulous! Pumpkin is one of my favourite things to bake with because it's so versatile and you can combine it with a lot of flavours. Careful with your oven temperature here; white chocolate burns at a lower temperature than milk or dark chocolate.

The recipe can be found here.

Friday, September 15, 2006

Pizza Time

Aaaah...the power of advertising!

I saw an add for something having to do with Philly Cheesesteak on the TV. I can't remember if it was a pizza ad from Panago or a Subway ad or what, but all it did was induce a craving for Philly Cheesesteak. In that regard the ad was successful; unfortunatly, I was more compelled to make my own version than go out and purchase whatever was being advertised.

I knew we had a spare striploin kicking around, as well as onions and peppers. I went out and bought a second steak, cheese, and pizza sauce. I made my own crust. This was a very hearty pizza that fed four of us. And it was superb. Please take the time to caramelize the onions - it's worth the extra effort, trust me!

For the crust:

2 1/4 - 2 1/2 cups bread flour (or all purpose, if that's all you have on hand)
1 package quick yeast (or 2 1/2 tsp)
3/4 tsp salt
1 cup very warm water
2 tbsp olive oil or vegetable oil
cornmeal

In a large bowl, combine the flour yeast and salt. Add the water and oil, and stir to form a soft dough. Develop until smooth and elastic. Cover and let it rise until double in size - about 1 - 2 hours depending on room temperature.

Meanwhile, start the caramelization of the onions.

4 large onions, thinly sliced (I used a food processor)
1 tsp salt
1 tbsp sugar

Put the onions in large frying pan and sprinkle on the sugar and salt. Cover and turn the stove on to medium high. You want to sweat out the liquid from the onions, and the salt aids in that. Once there is a lot of liquid in the pan and the onions look like they're about to drown, take off the cover and reduce the heat to medium. You now are waiting for the water to evaporate, and this will take several mintues. After the water has evaporated, stir the onions frequently, not letting them sit too long in one place. Eventually, they'll turn a lovely caramel colour which should be uniform. This entire process took about half an hour, and I used a non-stick saute pan which worked wonderfully.

Meanwhile, slice very thinly one green pepper, and once the onions are done and removed to cool, start sauteing the pepper in the same pan.

As the peppers saute, you'll need to prep the steak. I used two steaks, one striploin and one sirloin tip that weighed approximately 600g. Slice thinly and put in a bowl with 2 tsp vegetable oil and Montreal Steak Seasoning and garlic powder to taste (I used a couple of tsp of Montreal Steak Spice and 1/2 tsp garlic powder). Or you can marinate your steak any way you want to, but at the very least make sure it's seasoned well with salt and pepper.

Saute the steak to medium in the same pan you did the onions and peppers in, once you've removed the peppers to let them cool. Don't overcook the steak since it's going in the oven soon.

Back to the dough now. Punch it down and roll out to a rectangle approximately 9x13" (alternately, the Fleischmann's recipe book from whence this recipe came says you will get two 12" rounds from this recipe). Place it onto a large sheetpan (12x18" is best and what I used) that has been lined with parchment paper and sprinkled with cornmeal. Spread with pizza sauce and top with the onions, peppers, steak, and a mixture of grated mozzarella and cheddar cheeses, or a blend of your choice equalling about 3 cups.

Bake in a hot oven - 450F or so - for 20 - 25 minutes, or until golden on top and the crust is browned underneath (use a spatula to gently lift the pizza to check its underside for doneness).
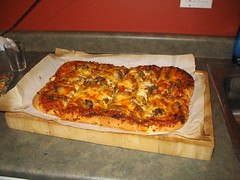
Philly Cheesesteak Pizza

Enjoy!

Tuesday, September 12, 2006

Basic Hearth Loaf


Basic Hearth Loaf
Originally uploaded by wanderingcoyote.

A couple of years ago, before I left Crapters and went off to culinary school, I purchased Rose Levy Beranbaum's The Bread Bible. I am ashamed to say, that until very recently, I've never made a single recipe from it, though I did refer to it quite a bit in school because it contains a lot of very valuable information on breadbaking.

The recipes are far more sophisitcated that what's generally found in my trusty Fleischmann's recipe book, and most of the breads involve a starter of some sort, or a sponge or predough. For this reason, I've avoided using this cookbook because sponges, predoughs, starters of various kinds always struck me as far too finicky and time consuming. Though the recipes are well-written and very easy to follow, each bread recipe involves several pages, and for some reason, this didn't seem worth it to me. I just want to get baking a loaf of bread, crying out loud!

What a fool I was. This basic loaf is absolutely the most fantastic homemade bread I've ever encountered - in terms of both flavour and texture, and interestingly enough, longevity. It's worth the extra time and effort, and there's no going back.

Basic Hearth Loaf

Step One
for the sponge:

1 cup bread flour
1/4 cup whole wheat flour or kamut flour
3/8 tsp quick or instant yeast
1 1/4 tsp honey
about 1 1/3 cups water, at room temperature (70-90F)

In a mixer bowl or other large bowl, combine these ingredients and whisk them for a couple of minutes to incorporate some air. It will be the consistency of a thick batter. Scrape down the sides of the bowl, cover with plastic wrap.

Step Two
Flour mixture

1 3/4 cups + 2tbsp bread flour
1/2 tsp quick or instant yeast
1 1/2 tsp salt

Combine these ingredients (the original recipe says to omit the salt until the kneading stage, but I haven't done this and it still works out) and gently scoop them over the sponge mixture, covering the sponge mixture completely. Cover with plastic wrap, and allow it to ferment for 1 - 4 hours at room temperature. The sponge will eventually bubble up through the flour and this is fine.

Step Three
Mix the dough. This is where the original recipe says to add the salt, so if you're doing that way, this is the time. I use my Kitchen Aid mixer for this because the dough is sticky. You're looking to mix all the ingredients well and form a homogenous ball of dough. Again, here I depart again from the original recipe and start the kneading process here, whearas Beranbaum instructs you to let it rest for 20 minutes, then knead it. I don't know why, but I've had no problems doing it my way.

Step Four
Knead the dough. I do this on speed 4 of my mixer for about 5 - 8 minutes, depending. You can do it by hand, too. The dough should be very elastic and slightly sticky to the touch. If it's sticking to the bottom of the mixer bowl and gooey still, add more bread flour, a tablespoon at a time. If it's too dry, add water a few drops at a time.

Step Five
Allow the dough to rise. Place it in a bowl that has been greased or sprayed with cooking spray. Grease the top of the loaf and cover it with plastic wrap. Proof it till it's doubled in volume - anywhere between 45 minutes to an hour and a half, depending.

Step Six
Shape the dough, and let it rise again. Once more, you're looking for double the volume. Preheat the oven at this time to 450F.

Step Seven
Score and bake. I use a small serrated knife to score this but you can also use razor blades or any other sharp knife. I sprinkled some flour on top, and I baked this on a baking sheet lined with parchement that had some cormeal spread on it. Immediately after putting the bread in the oven, turn the heat down to 425F. The baking process should take about 25-30 minutes; be sure to turn the bread once for even browning. Beranbaum advises you to bake the bread with some ice cubes sizzling away in a pan beneath the loaf; you can do this but I find putting a pan underneath my bread blocks the heat and it tends not to brown on the bottom. If you have a spray bottle that has a fine mist, you can spray the bread as you put it in the oven; the steam created produces crunch, shine, and helps with colour.

Step Eight
Remove from the oven and cool. Transfer to a wire rack immediately.

So, this process took me about 3.5 - 4 hours total. A lot depends on what your room temperature is like, the humidity in the air and other factors, but most of the steps involve just leaving it for a time, so you can go and do other things. Trust me, if you can pull this loaf off, people will adore you and compliment you by saying your loaf looks like it's been purchased at an artisan bakery.

Questions? Comments? You know what to do.


Saturday, September 09, 2006

I Am a Winner (of sorts)

Go here to see my winning Rossland Fall Fair entries and read about the competition (such as it was).

The bread recipe will follow shortly. The carrot cake recipe can be found here.

Monday, September 04, 2006

More Breads

Yesterday I baked two loaves of bread. My dad had purchased breadmaking ingredients for me so I can make him homemade bread on request. He prefers bread with no white flour in it, though I have told him you get a nicer loaf with at least some white bread flour in it becasue whole wheat and other whole grain flours contain less gluten, which gives you a taller loaf. But, I aim to please. This first loaf is adapted from a Canadian Living recipe I clipped out a while ago.

Healthy Heart Bread

2 1/2 cups whole wheat flour
1 cup oats
1/4 cup ground flax meal
1/4 cup wheat germ
3 tbsp packed brown sugar
1 1/2 tsp salt
2 1/4 tsp (or 1 package) quick yeast
2 cups very warm water
2 tbsp olive oil

Essentially, follow the breadbaking tutorial instructions. This makes a large loaf so it may not fit well into a regular-sized loaf pan, which is why I free-formed it instead. To do this, pound the dough, after it's rested, into a rectangle and roll it up jelly-roll style, tightly pinching the seam. Gently roll it back and forth to smooth it out and make it loaf-shaped. Score with a sharp knife after it's risen. Bake on a baking sheet lined with parchment paper sprinkled with cornmeal.

It'll look something like this, give or take. I know this looks slightly like a torpedo, but really, that's artisan bread-making at home for you.

You can substitute the brown sugar for honey, if you wish. You can also add whole flaxseeds in addition to or instead of the meal. If using meal, however, make sure it's ground fresh or has been stored in the fridge after grinding. It has a short shelf-life after being ground, so don't use anything that looks or smells off, or hasn't been stored properly.


I also made this buttermilk bread recipe from my trusty Fleischmann's recipe book. My dad is also sponsoring my entering several categories of the local fall fair, which happens next week, so I used this recipe as a practice run. I was so pleased with how this loaf turned out! It's gorgeous, and it tastes fantastic!

Buttermilk Bread (makes two loaves; halving works well...I do it all the time)

5 - 5 1/2 cups bread flour
3 tbsp sugar
2 packages quick yeast
2 tsp salt
1/4 tsp baking soda
1 cup buttermilk (or milk soured with 2 tsp lemon juice)
1 cup water
1/3 cup butter, cut into small pieces

Buttermilk Bread

Again, directions in the breadbaking tutorial. I think I'll for sure make this for the fall fair. I also plan to enter carrot cake with cream cheese icing, truffles, and possibly some cookies. There are categories for pies, muffins, loaves, and cakes, but I'll have to see what kind of time and energy I have. Also, you can only enter one item per category, so I can't enter more than one loaf of bread. There isn't an artisan bread category, otherwise I'd enter it, but I am going to suggest there be one next year.

Anyhow, wish me luck and enjoy the breads!

Wednesday, August 30, 2006

Pesto Bread


Pesto Bread
Originally uploaded by wanderingcoyote.

I made this using half a recipe of the basic white loaf contained in the bread baking tutorial post, adding 3tbsp of Classico pesto with the liquid ingredients. Since there's been no sun today, I didn't rise this in the window, or in the oven for that matter. I let it have a long, slow rise at room temperature. This took just over an hour. Before putting it in the oven, I glazed it with milk. The loaf smelled completely amazing as it baked, and it tasted just as amazing when it was baked and cooled. Tomorrow, I might try making pecan feta bread since both are on hand here.

Blueberry Oat Flax Muffins


Blueberry Oat Flax Muffins
Originally uploaded by wanderingcoyote.

Today was a great day for baking. It's been cool and rainy and that meant I could have the oven going all morning and not have to worry about heating the whole house up. This is the first of my three projects for the day.

I don't know where exactly I got this recipe from, but I made it growing up. I've added the flax and the lemon juice on my own. The batter is quite stiff - so don't expect lovely big caps - but the texture of the muffin is still tender. The flax add nutrients and crunch.

Blueberry Oat Flax Muffins

1 cup oatmeal
1 cup buttermilk or sour milk
1 cup flour
1 tsp baking powder
1/2 tsp baking soda
1/2 tsp salt
3/4 cup lightly packed brown sugar
1 egg
1/4 cup melted butter
2 tsp lemon juice
1 cup blueberries
2 tbsp flax seeds

1. In a small bowl, combine the oats and the buttermilk. (To sour milk, add 1 tbsp vinegar or lemon juice and let sit for 5 minutes.)
2. Whisk together the dry ingredients. Add the butter, egg, and lemon juice to the oatmeal mixture and blend well.
3. Fold the wet ingredients into the dry ingredients. Fold in the blueberries.
4. Fill muffin tins. Bake at 400F for 20 or so minutes, or until golden on top and a tester inserted comes out clean. It should yield 12.

Enjoy!

Monday, August 28, 2006

Anadama Bread


Anadama Bread2
Originally uploaded by wanderingcoyote.

I've been making a lot of bread lately. It's a cheap way of contributing to the household, it's theraputic, it's enjoyable, and I always get lots of compliments! This recipe came from my trusty Fleischmann's book, but there are lots of other recipes out there, and lots of stories about how this bread got its name. Here's a brief blurb containing some theories; another I've read has the bread originating in California during the gold rush. Whatever - this is a good, basic loaf.

Anadama Bread

3/4 to 1 cup very warm water
1 package quick yeast (2 1/4 tsp or 8g)
3 cups all purpose flour
1/3 cup yellow cornmeal
1 tsp salt
3 tbsp butter or margarine, melted
3 tbsp molasses

Follow the basic instructions contained in my bread-baking tutorial post. Lately, I have been rising my bread in a sunny spot, either in the kitchen window or on the table in the back yard. In direct sunlight, the rising process hasn't taken more than 30-40 minutes. Just grease the top of the loaf and loosely cover it in plastic wrap beforehand.

This dough was dense. I used more than 1 cup of water - probably 2 - 3 tbsp more, and it could have used even more than that. But it turned out nicely and had a great crust.

As usual, let me know how it goes, and enjoy!

Saturday, August 26, 2006

Peach Blueberry Crisp


Peach Blueberry Crisp
Originally uploaded by wanderingcoyote.

Oh, it's been a while, I know. Too long. It's been a long, rough summer and it ain't over yet. I've done little baking and even less cooking, though it's been a summer of eating quite possibly the worst food I've ever had to suffer through. Six and a half weeks of hospital grub is not fun at all.

I have moved - again. I am not working, and won't be for a while. I've been trying to keep myself occupied and have been making lots of bread. This crisp is the first sweet thing I've made in such a long time.

Peaches are in season, as are blueberries. My dad made a trip to the Okanagan earlier on in the week to get canning ingredients for us and a stash of farm-fresh fruit and veg for himself. On Wednesday, I canned over 48 pints of salsa and 26 1L jars of dill pickles with carrots with both my brothers' girfriends. The salsa was amazing. Today, the peaches my dad brought us were on the overripe side, and my sister-in-law, Shan, had some locally grown frozen blueberries kicking around. I decided to make this simple dessert, pictured here with some sugar free ice cream.

Peach Blueberry Crisp

8 fresh peaches, peeled and sliced
1 1/2 cups fresh or frozen blueberries
1/2 tsp cinnamon
1/4 tsp freshly grated nutmeg
2 tbsp sugar (the fruit was so ripe it didn't need a lot of sugar at all)
2 tbsp white flour

Topping

1 cup oats
1/3 cup whole wheat flour
1/4 cup brown sugar
1/2 tsp ginger
1/2 tsp cardamom
1/2 cup butter or margarine, cold

1. Preheat oven to 350F. In a bowl, combine the fruit with the sugar and spices, and lastly the flour. Put in the bottom of a 8" square pan that has been greased.

2. For the topping, combine all the dry ingredients with a whisk. Cut in the butter until you get a pea-sized consistency. Pour the crumble over the top and spread it out evenly. Don't press it down.

3. Bake for 35 - 45 minutes, or until golden on top and the filling is bubbling at the sides. Might be a good idea to put the pan onto a baking sheet in case of any boil-overs. Let it cool slightly and serve - with ice cream is nice, but not 100% necessary.

If you make it and like it let me know. Enjoy!

LinkWithin

Blog Widget by LinkWithin