Sunday, June 12, 2005

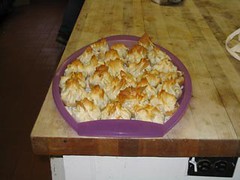
Apple Phyllo Cups


applephyllo
Originally uploaded by wanderingcoyote.

I made these at work this week and they were a huge hit. The other staff kept coming into the kitchen and looking in on me as I made these up, all saying, "We never get stuff like this here!" Indeed. I have seen what they're used to in terms of baking and I'm not surprised they're easily impressed.

These are super easy to make and make quite an elegant dessert or snack. They can be plated up with a rasperry coulis or just eaten cold. We made something like these in school, which is where I got the idea.

Here's what you need:

- about 2lbs of apples, preferrably Granny Smiths because they're nice and tart and keep their shape during the cooking process
- some lemons (juice and zest)
- cinnamon, ground ginger, nutmeg, allspice, cloves - all to taste
- melted butter
- raisins if you like them
- candied citrus peel, if you like it
- left over cake crumbs, cookie crumbs, or even bread crumbs (not entirely necessary but a good idea if your filling is too liquidy)
- a package of phyllo pastry, thawed
- muffin tin

Get yourself a large bowl and fill it with water. Quarter a lemon or two, squeeze out the juice and throw the quarters and juice into the bowl. This will keep the apples from turning brown. Peel & core the apples and place them in a bowl of water as you go. When they're all done, dice them roughly. Place in a saucepan with about a cup of water and bring to a boil. Add your spices, raisins, and peel, if using. Add the juice and zest of another lemon. Simmer until the apples are tender, which should take about 5 - 10 minutes, depending on how big you cut them. Add about 2 tbsp of cornstarch dissolved in an equal amount of cold water. Stir until thickened and bubbly. Remove from heat.

You'll need to make your cups about 4 - 6 sheets of phyllo thick. Lightly grease the muffin tins with melted butter. Very carefully separate your sheets out and cover the remaining phyllo with plastic wrap; it dries out quickly and it must be covered when you're not working with it. Now separate the phyllo into 2 - 3 layers each and brush lightly with melted butter; put your layers back together. Depending on how large your muffin cups are, cut the phyllo with a sharp knife into squares as best you can. The corners should come up well over the sides and when you press the middle into the bottom of the tin, and should be tall enough when pulled to gether to form little points. Rectangles are ok, and often inevitable. You can move around your phyllo layers to make the points work, but make sure the sides are high enough to accommodate the filling. You don't want any leaks or you'll never get these out after baking.

Check out your filling. If it's liquidy, you'll want to put in your crumbs to absorb some of the liquid and help prevent the filling from making the phyllo mushy. Or, add an extra layer or two of phyllo. Put a bit of filling in, enough so that you can pull the corners of the phyllo over the top and twist closed. Twist close, and work quickly from now now on so the phyllo doensn't dry out. When you've completed making the cups, brush the tops with some more melted butter. Bake at about 375F until just golden brown on the tops. Lift one out carefully to make sure they're golden on the bottom. Remove immediately from the muffin tins, preferrably with tongs, and cool on a wire rack. This step is essential, or the steam will turn the cups mushy on the bottom.

Serve warm or at room temperature. Creme Anglaise and ice cream would be lovely with this, as would the aforementioned raspberry coulis. Do not store in the fridge; the humidity will make the phyllo go soft.

Notes to the readership.

1. Work very, very carefully with phyllo as it is extremely fragile. Also, as I mentioned, it dries out quickly, so make sure you have your filling and muffin tins all ready to go before you cut your phyllo up.
2. Deeper muffin tins are better than shallower ones, just for the sake of presentation and use of phyllo, but use what you have on hand.

Enjoy - and as always, let me know what you think!

Sunday, June 05, 2005

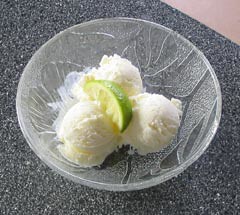
Lemon Ice Cream


LemonIce
Originally uploaded by wanderingcoyote.

Anita found this recipe yesterday in one of Richard's cookbooks. I'd been looking for a lemon ice cream recipe, actually, and this was absolutely fantastic! Anita, upon tasting it, thought she'd died and gone to heaven. She, like me, is a lemon fanatic. Aside from being delicious and refreshing, this also is a great palate cleanser.

My ice cream maker is a Cuisinart and it has a drum with a freezing liquid in it, and so you just freeze the drum over night, then plug the machine in and attach the drum, add your mixture, turn it on, and about 20 minutes later, you have ice cream. You put the ice cream into the actual freezer for a bit just to firm it up.

Here is the lemon ice cream recipe.

zest of 2 lemons
juice of 3 lemons
3/4 cup sugar
1 1/4 cups whipping cream (35% only!)
1 cup whole milk

I whisked this all together in a clear glass measure and away I went. Like I said, it was great.

You don't have to worry about the lemon curdling the milk and cream because the citric acid won't curdle anything with a fat percentage above 35%, so make sure you use the full whipping cream. Don't cut corners or calories by using half and half because this just won't work.

I used the zest and juice of one lime because I was down a lemon, and it worked fine.

My basic ice cream recipe is the following.

2 cups whipping cream
1 cup whole milk
3/4 cup sugar

To this you can add pretty much whatever your heart desires. I usually add about a tablespoon of vanilla extract. Also try cocoa powder to taste (sift it in), chocolate chips, mint & chocolate chips (about a tsp or two of mint extract but use your own judgement), or Grand Marnier or Bailey's Irish Cream to taste. But beware: adding alcohol will affect the freezing of your ice cream, so add it at the very end when the ice cream has already done it's freezing so you won't get a slushie!

Homemade ice cream is the best because you can use all natural ingredients and you know exactly what goes in it. Store bought contains all kinds of nasty chemicals and crap you really don't want in your body. My ice cream maker cost me about $80 Canadian, and I've gotten a lot of use out of it. A great investment, I must say.

Enjoy!

Saturday, June 04, 2005

Reflections on Failure

I just made a chocolate chip cookie recipe that was, in my mind, a resounding failure. I'd made the recipe successfully before once or twice back home, and didn't think I'd have any problems here.

There were some differences. For one thing, I used whole oats instead of quick oats, which may have affected the absorption of liquid. The baking soda may have been too old. The oven, I know, is not accurate. And the elevation may be different here than in Ottawa.

Nonetheless, I'm super annoyed. I rarely make anything at home that is this off the mark, and I feel like I've wasted some precious ingredients that were not purchased by me to begin with. There is no rum ball bin here to hide my shame or make something of them at later date to disguise my mistake. I will just have to live with this and do my best to learn from it. I know where the possible mistakes might have been, and so I must keep them in mind in the future. And that's pretty much all I can do.

But bear this in mind: no recipe is necessarily foolproof. Change one ingredient or make the recipe under completely different circumstances and you may find you get a completely different product in the end, as I have just done. But the important thing is to not panic and throw away the recipe. The important thing is to analyze and theorize, and keep experimenting. If you believe the recipe is worth it, you might be rewarded in the end.

And when in doubt, change the name. I will call these oatmeal chocolate chip cookies, "oatmeal chocolate chip lace cookies." Chances are, no one is going to know the difference, and you can claim you invented the whole thing yourself, thus making yourself out to be brilliant.

It isn't necessarily failure, it's revisionism.

Sunday, May 29, 2005

Chocolate Fudge Pudding

My mom used to make this for us once in a while and it's still one of my favourites. I made it the other night before my friend went back on her wheat free diet and it was a big hit. The cake is dense, moist, and fudgy and the beauty of this is that it's self-saucing! This is a great low-fat chocolate fix. It's very simple to make, and be sure to serve it warm - it's not the same cold. And there should be no leftovers!

1 cup flour
3/4 cup sugar
2 tsp baking powder
1/2 tsp salt
1/3 cup cocoa powder, divided
1/2 cup chopped nuts
3/4 cup lightly packed brown sugar
1/2 cup milk
2 tbsp veg oil or melted butter
1 tsp vanilla
2 cups hot (not boiling) water

1. Preheat the oven to 350F. In an ungreased 8" square pan, stir together the flour, sugar, baking powder, salt and 2 tbsp of the cocoa.
2. In a separate bowl, stir together the remaining cocoa powder, nuts, and brown sugar; set aside.
3. Stir milk, oil, and vanilla into the flour mixture in the pan and blend well. Spread out evenly. The batter will be thick.
4. Sprinkle nut mixture evenly over the batter and carefully pour the hot water over everything. DO NOT STIR!
5. Bake until tester inserted comes out clean. Serve warm. Enjoy!

Notes to the readership.

- Whatever you do, mind you DO NOT STIR the mixture after the water has been added! This is going to make the lovely pudding-like sauce. It will thicken on it's own – trust me.
- For some strange reason, the nuts tend to all gravitate towards the centre of the cake during baking. I have never been able to figure this out, but you may notice this, too. You'll just have to live with it.
- Make sure you use an 8" pan for this. They didn't have one here, so I had to make it in something a bit smaller and it nearly overflowed over the sides. I would also recommend you put the pan on a baking sheet when you go to bake this, just to be safe.

Monday, May 16, 2005

Pasta with Seafood, Sundried Tomatoes, and Feta Cheese

Who says pasta needs to have sauce? Not I!

Remember this? Well, today's recipe is a variation and it's just as easy and tasty. With one day to go before I head off into the great wide world, where, remember, my blogging may be irregular, I present to you Pasta with Seafood, Sundried Tomatoes, and Feta Cheese. Enjoy!

You will need:
Pasta - as much as you need or want
Shrimp - large, shelled and deveined - as many as you like (or other shellfish - clams, mussles, squid, etc.)
Salmon filet - an equivalent amount to your shrimp
Some oil-packed sundried tomatoes, finely chopped
Fresh Italian flat-leaf parsley, finely chopped
One or two green onions, finely sliced
Good quality olive oil, salt & pepper
Feta cheese, crumbled

Season your salmon with some olive oil, salt & pepper. Bake in the oven at 400F until cooked through. Remove from oven and take a fork to it, chunking in up. Cook your pasta & shell your shrimp. When the pasta is nearly al dente (with a bit of bite to it), put in the raw shrimp and continue to cook until the shrimp are pink. Drain the whole thing and return it to the pot. Drizzle some olive oil over and season with salt & pepper, giving it a good stir. Add the onions, sundried tomatoes, salmon, parsley, and feta. Stir together and serve, garnished with a little parmesan cheese (and remember to spend the cash and get the real stuff, eh?).

Easy enough for you?

Notes to the readership.

- Italian flat leaf parsley is lovely stuff, with a more distinct flavour than the curly parsley. It looks a lot like cilantro, so make sure you know what you're buying.
- You can use any pasta you like or have in your pantry. I have used penne and spaghettini and both work well.
- I know shrimp are expensive, but the less expensive frozen shrimp are just fine. You can often find them "zipperback", which means they've made a slit in the back to remove the vein, and it is so worth it get these as opposed to fresh shrimp, because deveining shrimp can be a time-consuming and annoying task.
- If you're not fond of salmon, omit it, or use a fish you do like. You might get a good result with tinned salmon, too, though it tends to be a bit mushy.
- Seasoning the water you boil your pasta in very well with salt is something I've just recently started doing, and I recommend you do, too. It makes a huge difference! Add enough salt so the water tastes salty.

Questions? Comments? You know the deal!

Ta ta for now! Be well and eat well everyone! I shall return, never fear!

Monday, May 09, 2005

ReTorte Reappearance, But...

Thanks to my vigilant readership, I was alerted on Saturday that this blog was unaccessible over the weekend. I couldn't access it myself, and quickly fired off an email to Blogger, who quickly responded with a form email containing some useless links. Later on that day, shortly after I emailed them back again to tell them their links were useless, the ReTorte reappeared. I do not know what the issue was, but I was panicking quite a bit. Thank God the problem seems to have been solved.

I am experiencing some upheaval in my life right now and will be moving shortly. I will have access to a computer, but with dial-up instead of high-speed. So I won't be posting here very much after next week, but rest assured, I won't have disappeared from the world of blogging, and I'll update as I can. Same goes for my Wandering Coyote blog. I will try to visit your blogs as often as I can, too, but just not as much as usual. And please keep commenting on both blogs!

Wednesday, May 04, 2005

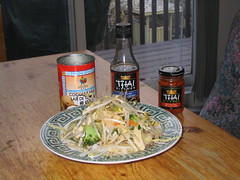
Thai Curry


IMG_0475
Originally uploaded by wanderingcoyote.

My husband claims this is as good as what they serve at our local Thai restaurant, Sweet Basil. If nothing else, this will clear your sinuses! Here's what I did:

For the stirfry: I took two boneless skinless chicken breasts, sliced them up, and stirfried them until cooked through in some sesame oil. When that was done, I added: some broccoli florets, 2 julienned carrots, some sliced mushrooms, a sliced onion, 1 can water chestnuts (sliced in half), 1 can bamboo shoots, and 1 can miniature cobs of corn (quartered). I obviously drained the canned stuff first! I stirfried this a few minutes until the broccoli turned bright green. Then I added the sauce.

For the sauce: Thai cuisine has a balance between salt, sweet, sour, and spicey. Here are the five ingredients for the sauce: red curry paste (spicey), fish sauce (salty), coconut milk, lime juice(sour), sugar (sweet). As you can see in the picture, I used Thai Kitchen brand fish sauce and curry paste, and I basically followed the recipe on the jar of paste when making this. But I don't like really spicey food, so I cut down the amount of curry paste. The approximate measurements were 2 tbsp fish sauce, 1 tsp curry paste, juice of 1 - 2 limes (mine weren't juicy so bear that in mind), 1 - 2 tbsp sugar, and 1 can (398mL) coconut milk. I whisked this all up in a glass liquid measuring cup.

I added the sauce and stirfried until heated through. I then added a couple of handfuls of freshly chopped cilantro, and garnished with bean sprouts. I served this over a bed of basmati rice.

Notes to the readership.

- Fish sauce smells RANK. The first time I bought it, back in my university days, I chucked it out before using it because I thought it stank too much. But, those were my salad days and I was concentrating on things other than food. Do not sniff this or you may be put off! But it tastes great and is a must for any Thai dish.
- Make sure you buy coconut milk for cooking rather than baking. The baking variety is much thicker. Also noteworthy about coconut milk is that it isn't so bad for the waistline: 1/4 cup contains only 60 calories and 1 gram of carbs.
- Re. the sauce, do everything to your own taste. My husband likes this much spicier, and if you like it hot, add more curry paste. When you're mixing the ingredients, put them in a glass measure as I did and taste the sauce first before adding it to the stirfry, so that you can adjust it at will. Also, many Thai sauces tend to be more soupy as they didn't adopt thickeners when their cuisine was evolving, so don't do anthing stupid like adding cornstarch to this - it isn't necessary.
- The key to any good stirfry is having everything chopped up and ready to go before even starting to cook. This is essential! You don't want to be chopping one thing up as another cooks. That is a recipe for stirfry disaster! Also essential is that you ensure that your ingredients are approximately the cut the same size and thickness, to promote even cooking.
- You do not need a fancy wok to stirfry, although it's more fun. A cast iron skillet or large frying pan is perfectly fine - as long as you don't get overzealous and start flinging your veggies around as you stirfry.
- Always add the cilantro last. It's a fresh herb and very delicate. Overcooking it will only kill it.

Tuesday, May 03, 2005

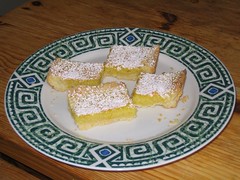
Lemon Squares


IMG_0473
Originally uploaded by wanderingcoyote.

The recipe is here.

Sunday, May 01, 2005

Two Grain Cranberry Bread

This is a fantastic breakfast item full of fibre and flavour. I usually have it with some cheese to add some protein.

1/2 cup butter, softened
2/3 cup brown sugar
2 eggs
1 cup quick oats
1 cup all purpose flour
2/3 cup whole wheat flour
1/2 tsp each baking powder & baking soda
1/2 tsp salt
1/4 tsp ground cloves
1 cup dried cranberries (Craisins)
1/2 cup chopped pecans, toasted
1 1/4 cups unsweetened applesauce

1. Preheat oven to 350F. Prepare a 9"x5" loaf pan - grease & flour, or grease & parchment (what - you haven't bough parchment paper yet? C'mon!).
2. In a large bowl, beat the butter and sugar until fluffy. Beat in eggs, one at a time. Is this sounding familiar?
3. In a separate bowl, whisk together oats (reserving 2 tbsp), flours, baking soda, baking powder, salt, and cloves. Add cranberries & pecans. Stir into butter mixture alternately with applesauce, making 3 additions of oat mixture and 2 of applesauce.
4. Scrape into loaf pan. Sprinkle with reserved oats. Bake approximately one hour or until tester comes out clean. Let it cool in the pan 10 minutes before turning it out onto a wire rack to cool completely.

Notes to the readership:

- Hmmm...I have no notes this time. That's a first! If you have questions, you know what to do.

Friday, April 29, 2005

Harira

Love cilantro? I do! This is a soup that comes from the Middle East, and apparently Muslims often break their fast with this during Ramadan. This is so incredibly flavourful, and healthy to boot. It's easy to make and the ingredients aren't hard to find.

1 each large bunch fresh cilantro and parsley
8 cups of vegetable or chicken stock
1 cup brown or green lentils
1 can (19oz) chickpeas, rinsed and drained
2 cans (19oz) tomatoes, chopped (I use 1 28oz can of diced)
2 onions, chopped
2 tsp cinnamon
1 tsp each ground cumin, turmeric, ginger, pepper
1/4 cup lemon juice
2 tbsp olive oil (optional)

1. Chop 1/4 cup each of the cilantro and parsley and set aside. Take the rest and tie it together with some kitchen string and stick it in a large pot. Add the stock and bring it to a boil. Reduce heat to low; cover and simmer for 15 minutes. Discard herb bundle. Add lentils and simmer for 15 minutes.
2. Add chickpeas, tomatoes, onions, spices. Cover and simmer for 30 minutes.
3. Puree 3 cups of the soup. Return to the pot and heat through. Stir in the lemon juice, oil (if using), and reserved chopped herbs.

Notes to the readership:
- instead of tying the herbs together, I use a piece of cheesecloth and make a bundle out of it. It works really well and is much easier to handle when it comes time to discard it. Cheesecloth is super cheap, and has a few other uses in the kitchen, too.
- I have an immersion blender, so I just use it to puree at the end. I like this a bit smoother, but puree as much or as little as you'd like - but puree at least the 3 cups because this soup shouldn't be super chunky.
- I first had Harira in a Moroccan place in Old Quebec City and I was hooked! Theirs had a bit of pasta in it, but not very much. I'm sure there are many recipes for this soup.
- if you serve this with some kind of rice, you'll get a complete protein.
- I never add the olive oil in order to keep it fat free, and I've never missed it. Don't skip the lemon juice - and squeeze it fresh, eh? - you'll regret it; it adds such a bright flavour to this.

Wednesday, April 27, 2005

Info

Just realized I still had my other blog blocked off from my profile. This was because I didn't want the school I was at tracking me down. So I do have a regular blog, and now will engage in some shameless blogwhoring..........

Please feel free to visit visit my den here. A link is conveniently located on my sidebar.

Cardamom Loaf

This is a fantastic, tasty and moist loaf, perfect for a snack, with coffee or herbal tea, and amazing right out of the oven smeared with butter.

1/2 cup butter
2/3 cup granulated sugar
2 eggs
1 tsp vanilla
2 cups all purpose flour
2 tsp baking powder
2 tsp ground cardamom
1/2 tsp salt
2/3 cup milk

1. Preheat oven to 325F and grease/flour - line with parchment paper (you'll need a bit of grease on the sides so the paper'll stick)! - a small loaf pan (22cm x 11cm, of for my American readers 8.5 x 4.5 inches).
2. In a large bowl, with an electric mixer, cream butter and sugar until fluffy. Add eggs, individually, and cream some more. Add vanilla.
3. In a separate bowl, sift your dry ingredients together. Alternately stir this into the egg/butter mixture with the milk, until well-combined.
4. Pour into the prepared pan and smooth the top with a knife. Bake for 55 - 60 minutes, or until a tester inserted comes out clean. Let it cool in the pan for 5 minutes before turning it onto a wire rack to cool completely.

Notes to the readership.

- If using a glass pan, decrease the oven temperature by 25 degrees.
- Cardamom is an expensive spice. I tend to buy it in small amounts from the bulk store to keep costs down. It's a wonderful spice, though, and can be used in savoury dishes as well. The Afgan Horsemen (see sidebar under Vancouver) use it in their cooking and it's so fragrant and tasty. It's delicate and warm, so don't overpower it with stronger flavours. In baking, it's often paired with citrus because they make a great team, and the citrus helps bring out the flavour. In school, I made an orange cardamom white chocolate mousse that was excellent. Paired with orange, it would make a great addition to cheesecake, too, I think, or even creme brulee. In this recipe, it's on its own, so you'll get a real sense of its flavour and what else you can pair it with.
- I don't think I've ever baked this for the full hour or so, but I have a hotter oven. Just keep an eye on it and give it at least 45 minutes before checking on it the first time.

Monday, April 25, 2005

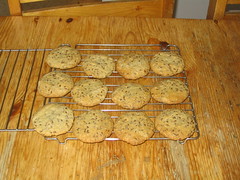
Farmland Flax Cookies


IMG_0472
Originally uploaded by wanderingcoyote.

This is a great recipe, and as healthy as a cookie as you'll ever get. The flaxseeds provide, on top of Omega-3 fatty acids which we all know are so healthy, a great crunch.

1/2 cup butter, softened
1/2 cup packed brown sugar
1/3 cup granulated sugar
1 egg
1/2 tsp vanilla
1 cup all purpose flour
3/4 cup quick oats
2/3 cup flaxseeds
1 tsp baking soda

Preheat your oven to 350F. Cream your butter and sugars until fluffy. Add the egg and vanilla, and cream some more. Combine flour and soda and add until well combined. Add the oats and flaxseeds and mix to combine. Drop by generous spoonfuls onto a greased cookie sheet, or one lined with parchment paper. Bake about 12 minutes, or until golden brown.

Notes to the readership:

1. This is a really stiff dough, so you may need to use a mixer - either the stand kind or electric hand-held variety. You can make it by hand, too, but you may need to get your actual hands in their to get everything properly combined. So make sure you're hands are clean, eh?
2. I cannot say enough about parchment paper - really, it's the best thing out there for home baking. As I've said before, you can reuse it until it falls apart, and it isn't terribly expensive. You'll save yourself so much time and effort - I promise! You cannot substitute waxed paper (unless you're making a cake and the paper will by entirely covered by batter) - it'll just smoke up your place and make your fire alarm go off.

Enjoy!

PS. This is a purloined recipe from Canadian Living.

Profiteroles with Devonshire Clotted Cream


IMG_0471
Originally uploaded by wanderingcoyote.

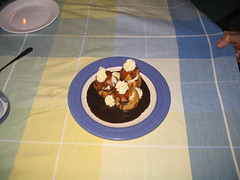
So here is a shot of the dessert I made on Saturday night. The profiteroles (choux) are filled with orange-spiked whipped cream and a Grand Marnier ganache was poured over the top. The clotted cream I piped out with a star tip on the top of each profiterole and an extra few rosettes decorate the plate. I made something similar to this my first time doing dessert for the restaurant, way back in October.

Clotted cream is amazing stuff; I sweetened this with a bit of sugar and added some Grand Marnier to it as well. The combination of orange and chocolate is divine, and cream of any consistency is an amazing addition to any dessert.

Sunday, April 24, 2005

Fast and Easy Snacking Cake

This is a great, easy recipe that isn't incredibly fattening. It's versatile, as you can use either pumpkin, apple sauce, or mashed bananas. Ice with a simple buttercream icing or a cream cheese frosting.

2 eggs
1/3 cup melted butter, or vegetable oil
1/2 cup granulated sugar
1/2 cup brown sugar, packed
1 cup mashed over-ripe bananas, OR canned pumpkin puree, OR 3/4 cup smooth apple sauce
1 1/2 cups flour
1 tsp baking powder
1/2 tsp baking soda
1/2 tsp salt
1 tsp cinnamon
1/4 tsp each ground nutmeg, allspice, and cloves

Preheat oven to 350F. In a large bowl, combine the eggs, butter/oil (make sure the butter has cooled a bit) and sugars. With an electric mixer, beat until smooth and creamy - about 1 minute. Add whatever fruit you're using and blend very well. In a separate bowl, sift together your dry ingredients - flour, salt, baking powder, soda, and spices. You can omit the spices in the banana version if you don't think they work. Add the dry ingredients in two or three additions, with a wooden spoon or spatula, and stir just until all the dry ingredients are fully incorporated. Pour into a greased and floured 8" or 9" square pan. Bake 40 - 45 minutes, or until a tester comes out clean when inserted in the middle. Cool completely on a wire rack before icing it, slice and serve.

Notes to the readership.

1. For God's sake - don't overmix this or your cake might sink once it comes out of the oven because you've incorporated too much air.
2. Also, you can mix the dry ingredients in with the electric mixer - just be very brief about it. A) you don't want to overmix (see above) but B) you also don't want to work your flour too much. Cakes, cookies, etc. generally turn out better when you fold in the flour by hand because using an electric device tends to work the gluten in the flour too much, then you don't wind up with as tender a product in the end.
3. If you use the pumpkin, DO NOT use pumpkin pie filling! It's not pure pumpkin and contains sugars and seasonings that may or may not work here. You need to use pure pumpkin and pure pumpkin only.

LinkWithin

Blog Widget by LinkWithin